How to add “Email Subscription Form” to Blogger Blogspot

Posted by Unknown

email subscription form, blogger blogspot, gadgets
When you are providing useful information in your blog, then many times some readers will need to get the latest updates from your blog. For that purpose, you need an Email Subscription Form in your blog, so that the interested visitors can easily get the latest updates.


To add email or Feed Subscription Form to your blogger blog (blogspot) is very easy.
Just follow the next steps:

1. Log in to Blogger, then go to Layout > click on "Add a Gadget" link:


 2. From the pop-up window, scroll down and click on the "HTML/JavaScript" gadget:


 3. Paste the following code inside the empty box:
<style>
.hl-email{
background:url(https://blogger.googleusercontent.com/img/b/R29vZ2xl/AVvXsEj5KjUxZvyBZYotHczIddYtvFJ4UTNqvizkxdjJJPTrefERGoLt8FKVdd4lFp453ExHhTSGlOy-DVscvG1asNXiZol7hqUmZXpQfq4eYeo2-03_QMSw6T3xaF4EoGrhUtEWU-2OBVeA17k/s1600/mail.png) no-repeat 0px 12px ;
width:300px;
padding:10px 0 0 55px;
float:left;
font-size:1.4em;
font-weight:bold;
margin:0 0 10px 0;
color:#686B6C;
}
.hl-emailsubmit{
background:#9B9895;
cursor:pointer;
color:#fff;
border:none;
padding:3px;
text-shadow:0 -1px 1px rgba(0,0,0,0.25);
-moz-border-radius:6px;
-webkit-border-radius:6px;
border-radius:6px;
font:12px sans-serif;
}
.hl-emailsubmit:hover{
background:#E98313;
}
.textarea{
padding:2px;
margin:6px 2px 6px 2px;
background:#f9f9f9;
border:1px solid #ccc;
resize:none;
box-shadow:inset 1px 1px 1px rgba(0,0,0,0.1);
-moz-box-shadow:inset 1px 1px 1px rgba(0,0,0,0.1);
-webkit-box-shadow:inset 1px 1px 1px rgba(0,0,0,0.1); font-size:13px;
width:130px;
color:#666;}
</style>
<div class="hl-email">
Subscribe via Email <form action="http://feedburner.google.com/fb/a/mailverify" id="feedform" method="post" target="popupwindow" onsubmit="window.open('http://feedburner.google.com/fb/a/mailverify?uri=fe-blogger', 'popupwindow', 'scrollbars=yes,width=550,height=520');return true">
<input gtbfieldid="3" class="textarea" name="email" onblur="if (this.value == &quot;&quot;) {this.value = &quot;Enter email address here&quot;;}" onfocus="if (this.value == &quot;Enter email address here&quot;) {this.value = &quot;&quot;;}" value="Enter email address here" type="text" />
<input type="hidden" value="fe-blogger" name="uri"/><input type="hidden" name="loc" value="en_US"/>
<input class="hl-emailsubmit" value="Submit" type="submit" />
</form>
</div>

Settings 
  • Replace the url address in green to change the email icon
  • Increase/Decrease the 130 width value for a wider text area
  • Replace http://feedburner.google.com/fb/a/mailverify?uri=fe-blogger with your Feedburner Email Feed link. You can get it by visiting your feedburner account then navigate to Publicize and then to Email Subscriptions.
  • Replace fe-blogger with your feed title. It appears at the end of your feed link. In my case it is http://feedburner.google.com/fb/a/mailverify?uri=fe-blogger

4. Now Save your widget and check your blog. Enjoy!

More aboutHow to add “Email Subscription Form” to Blogger Blogspot

Awesome fe-blogger Subscription Widget for blogger

Posted by Unknown

fe-blogger Subscription box Blogger
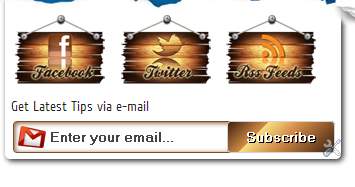
This post is about how to add a Subscription Box like our NetOops blog. Subscription box contains Facebook, Twitter, RSS Feed, e-mail subscription. This widget is based on a wooden theme. Facebook, Twitter, RSS Feed links are shown as Natural Wooden Sticky Boards. In this tutorial i am adding a new e-mail subscription box with wooden theme.


Subscription box with Fully Wooden Theme

  • Go to Blogger Dashboard
  • Go to Layout 
  • Select Add a Gadget
  • You can type title any
  • And Copy the following code in the content.
Demo of Fully Wooden Theme

 Important: If you don't want Mouse over effect of Images in the Subscription box, please delete the RED highlighted code,. If you want then leave it there.
    <style type="text/css">
     /* Delete form Here*/ 
    img.beintouch:hover {
        background: none repeat scroll 0 0 #D6D6D6;
        border-radius: 16px 16px 16px 16px;
        box-shadow: 0 0 10px #565656;
    }
    /* Delete to Here*/
    .emailtext {
        background: url("https://blogger.googleusercontent.com/img/b/R29vZ2xl/AVvXsEjdPM9VubZpVOmzkgFxhYwtUmlgPUoJ-ZJI7OPL73bexG_yd9rF8_0WYdM_bjZIeCgSimnxAKkJhmfNSTrASwh7tsjmetY-P-csXdo49uYCytrzORMJPIvYPBVUjgpgc6fcZ1j3gub85nU/s1600/mailbox.png") no-repeat scroll 4px center transparent;
        border: 1px solid #7E4E27;
        border-radius: 4px 4px 4px 4px;
        box-shadow: 1px 1px 4px #7E4E27 inset;
        color: #444444;
        font-weight: bold;
        margin-left: 2px;
        padding: 7px 15px 7px 35px;
        text-decoration: none;
        width: 176px;
    }
    .ebutton {
        background: -moz-linear-gradient(-45deg, #3C1F0E 0%, #D28A47 30%, #F9E183 30%, #D28A47 55%, #3C1F0E 100%) repeat scroll 0 0 transparent;
        border: 1px solid #D3D3D3;
        border-radius: 4px 4px 4px 4px;
        color: #FFFFFF;
        cursor: pointer;
        font-weight: bold;
        margin-left: -18px;
        margin-top: 5px;
        padding: 6px 15px;
        text-decoration: none;
        text-shadow: 1px 1px 0 #000000;
    }
    </style>
    <table align="center" width="317px" cellspacing="0px" cellpadding="1px"><tbody><tr><td><a target="_blank" rel="nofollow" href="http://www.facebook.com/pages/NetOops-Blog/159796530791611"><img src="https://blogger.googleusercontent.com/img/b/R29vZ2xl/AVvXsEhvDiVIRrm6TJL9n2aN42X6qjbGXHrkugSqAkrvdf0HxqLSDeyhGdqqf5X0P8DUHmvyGwDNHR_PPOpXqovv_n8IygFRthVYrhXVQRglaqLJRi04XdkUCAc9r5bBoH9-pzpufw6PPUX1lgY/s1600/woden+board+facebook_netoops.png" class="beintouch" /></a></td><td><a target="_blank" href="http://twitter.com/fe-blogger/" rel="nofollow"><img src="https://blogger.googleusercontent.com/img/b/R29vZ2xl/AVvXsEgsSqTKTWCiHGLruyXPTAbCBHoJRIXf90G8QEDk3hEK_gGMVwSlvSdibK57wAVYLq2-dBb0rRAexv9QITRA2kdb1aLWnEv6gIAosZvMFLJfTNoYXkl4qPml9GZTKabYCJyd4-8vjzNKPPw/s1600/woden+board+twitter_netoops.png" class="beintouch" /></a></td><td><a target="_blank" href="http://feeds.feedburner.com/fe-bloggergerTricks" rel="nofollow"><img src="https://blogger.googleusercontent.com/img/b/R29vZ2xl/AVvXsEiVKt5G5FaUPY1JcvOjMVa49kYZMl5Y7mgwIKxbJRkqToFvc4Wzfq_g52ITMAMFer2PA-i-POkVrzNWABj13C8MtHp3qKKsFt2gvl09xx2kVf3NtvhRhCAe-j-3JUrfY6mm-fDzC1m_-hE/s1600/woden+board+RSS1_netoops.png" class="beintouch" /></a><a href="http://fe-blogger.blogspot.com"></a></td></tr></tbody></table>
    <div>Get Latest Tips via e-mail</div>
    <form target="popupwindow" style="margin: 0pt;" onsubmit="window.open('http://feedburner.google.com/fb/a/mailverify?uri=fe-bloggergertricks', 'popupwindow', 'scrollbars=yes,width=550,height=520');return true" method="post" class="emailform" action="http://feedburner.google.com/fb/a/mailverify">
    <input type="hidden" value="fe-bloggergerTricks" name="uri" />
    <input type="hidden" value="en_US" name="loc" />
    <input type="text" value="Enter your email..." onfocus="if (this.value == &quot;Enter your email...&quot;) {this.value = &quot;&quot;}" onblur="if (this.value == &quot;&quot;) {this.value = &quot;Enter your email...&quot;;}" name="email" class="emailtext" />
    <input type="submit" value="Subscribe" title="" class="ebutton" alt="" />
    </form>


    Change the BLUE highlighted code with FACEBOOK PAGE URL, TWTTER, FEED URL, FEED ID respectively.

    Subscription box with Default Basic Wooden theme

    • Go to Layout 
    • Select Add a Gadget
     Important: If you don't want Mouse over effect of Images in the Subscription box, please delete the RED highlighted code,. If you want then leave it there.
    <style type="text/css">
     /* Delete form Here*/ 
    img.beintouch:hover {
        background: none repeat scroll 0 0 #D6D6D6;
        border-radius: 16px 16px 16px 16px;
        box-shadow: 0 0 10px #565656;
    }
    /* Delete to Here*/
    </style>
    <table align="center" width="317px" cellspacing="0px" cellpadding="1px"><tbody><tr><td><a target="_blank" rel="nofollow" href="http://www.facebook.com/pages/NetOops-Blog/159796530791611"><img src="https://blogger.googleusercontent.com/img/b/R29vZ2xl/AVvXsEhvDiVIRrm6TJL9n2aN42X6qjbGXHrkugSqAkrvdf0HxqLSDeyhGdqqf5X0P8DUHmvyGwDNHR_PPOpXqovv_n8IygFRthVYrhXVQRglaqLJRi04XdkUCAc9r5bBoH9-pzpufw6PPUX1lgY/s1600/woden+board+facebook_netoops.png" class="beintouch" /></a></td><td><a target="_blank" href="http://twitter.com/fe-blogger/" rel="nofollow"><img src="https://blogger.googleusercontent.com/img/b/R29vZ2xl/AVvXsEgsSqTKTWCiHGLruyXPTAbCBHoJRIXf90G8QEDk3hEK_gGMVwSlvSdibK57wAVYLq2-dBb0rRAexv9QITRA2kdb1aLWnEv6gIAosZvMFLJfTNoYXkl4qPml9GZTKabYCJyd4-8vjzNKPPw/s1600/woden+board+twitter_netoops.png" class="beintouch" /></a></td><td><a target="_blank" href="http://feeds.feedburner.com/fe-bloggergerTricks" rel="nofollow"><img src="https://blogger.googleusercontent.com/img/b/R29vZ2xl/AVvXsEiVKt5G5FaUPY1JcvOjMVa49kYZMl5Y7mgwIKxbJRkqToFvc4Wzfq_g52ITMAMFer2PA-i-POkVrzNWABj13C8MtHp3qKKsFt2gvl09xx2kVf3NtvhRhCAe-j-3JUrfY6mm-fDzC1m_-hE/s1600/woden+board+RSS1_netoops.png" class="beintouch" /></a><a href="http://fe-blogger.blogspot.com"></a></td></tr></tbody></table>
    <div>Get Latest Tips via e-mail</div>
    <form target="popupwindow" style="margin: 0pt;" onsubmit="window.open('http://feedburner.google.com/fb/a/mailverify?uri=fe-bloggergertricks', 'popupwindow', 'scrollbars=yes,width=550,height=520');return true" method="post" class="emailform" action="http://feedburner.google.com/fb/a/mailverify">
    <input type="hidden" value="fe-bloggergerTricks" name="uri" />
    <input type="hidden" value="en_US" name="loc" />
    <input type="text" value="Enter your email..." onfocus="if (this.value == &quot;Enter your email...&quot;) {this.value = &quot;&quot;}" onblur="if (this.value == &quot;&quot;) {this.value = &quot;Enter your email...&quot;;}" name="email" class="emailtext" />
    <input type="submit" value="Subscribe" title="" class="ebutton" alt="" />
    </form>


    Change the BLUE highlighted code with FACEBOOK PAGE URL, TWTTER, FEED URL, FEED ID respectively.

    I think this widget helps you, Please share and like...
    More aboutAwesome fe-blogger Subscription Widget for blogger

    Add Floating Social Media Sharing Buttons To Blogger

    Posted by Unknown

    The Floating Social Media Sharing is a very popular widget on all the top blogs, being a very good way to increase the number of times your posts get shared on Twitter, Facebook and other social networks. It has some of the following functions: Facebook Like, StumbleUpon, Twitter Share, Digg This, Google+ and RSS Feed Icon and each of them comes with a live counter. You can add more sharing buttons or social bookmarking icons later if you wish.

    Blogger, WordPress, Facebook, Share

    How to add the scrolling social bookmarking bar


    The code to copy-paste (updated!):

    <!-- floating share bar Start fe-blogger.blogspot.com--> <style type="text/css"> #pageshare {position:fixed; bottom:5%; margin-left:-721px; float:left; border-radius:5px;-moz-border-radius:5px;-webkit-border-radius:5px;background-color:#fff;padding:0 0 2px 0;z-index:10;} #pageshare .sbutton {float:left;clear:both;margin:5px 5px 0 5px;} .fb_share_count_top {width:48px !important;} .fb_share_count_top, .fb_share_count_inner {-moz-border-radius:3px;-webkit-border-radius:3px;} .FBConnectButton_Small, .FBConnectButton_RTL_Small {width:49px !important; -moz-border-radius:3px;/*bs-fsmsb*/-webkit-border-radius:3px;} .FBConnectButton_Small .FBConnectButton_Text {padding:2px 2px 3px !important;-moz-border-radius:3px;-webkit-border-radius:3px;font-size:8px;} </style> <div id='pageshare' title="Get this from Helpblogger.com">
    <div style="margin-left:8px;"><div class='sbutton' id='like' style='margin: 5px 0 0 5px;'><script src='http://connect.facebook.net/en_US/all.js#xfbml=1'></script><fb:like layout='box_count' show_faces='false'></fb:like> </div></div>
    <br /><div class='sbutton'><a class='twitter-share-button' data-count='vertical' data-via='fe-blogger' expr:data-counturl='data:blog.url' href='http://twitter.com/share' rel='nofollow'>Tweet</a><script src='http://platform.twitter.com/widgets.js'; type='text/javascript'></script>
    <br /><div class='sbutton' id='su'> <script src="http://www.stumbleupon.com/hostedbadge.php?s=5"></script> </div> <div class='sbutton' id='digg' style='margin-left:3px;width:48px'> <script src='http://widgets.digg.com/buttons.js' type='text/javascript'></script> <a class="DiggThisButton DiggMedium"></a> </div> <div class='sbutton' id='gplusone'> <script type="text/javascript" src="https://apis.google.com/js/plusone.js"></script> <g:plusone size="tall"></g:plusone></div><br/><a href='http://feeds.feedburner.com/fe-blogger' rel='nofollow' target='_blank' title='Subscribe To Our Rss Feed'><img src='https://blogger.googleusercontent.com/img/b/R29vZ2xl/AVvXsEg3nTdcAzarRY6ueNI6RYp92BYQrUnqyYmIwj-i2pzBMl_1NnbYv24n_tHQcf5yoC-vQghLRDRsmUbPJWJhsjzcOqE7RZ8noRv1oWkb63tBM4X8ErwjOXpsu9pbeWTbujWHLJ4EXqFDBv6j/s1600/icon_rss_reader.png'/></a><div style="clear: both;font-size: 9px;text-align:center;">Get <a style="color: #3399BB;" href="http://fe-blogger.blogspot.com/">widget</a></div><!-- Do not remove this link --> </div> <!-- floating share bar End --></div>


    Customization:
    • Vertical alignment - Change the value of bottom in code line 3. The code positions the button relative to the bottom of your browser window. To fix the distance even when window is resized, specify the value in px (pixels) instead of %.
    • Horizontal alignment - Change the value in red of margin-left. Negative value pushes the button to the left of the main blog column, positive value pushes it to the right. Increase or decrease the value based on your needs.
    • Twitter setting - Replace fe-blogger with your Twitter username
    • Replacing and removing buttons - You can replace existing buttons with your own. Each button is represented by this code: <div class='sbutton'> BUTTON CODE HERE </div>
    • RSS Feed - Change the text in blue with the url address of your RSS feed.
    Enjoy :)


    More aboutAdd Floating Social Media Sharing Buttons To Blogger

    Create A Rollover Image Effect (change image on mouseover)

    Posted by Unknown

    The Rollover effect is one in which an image web object changes (swaps itself) on mouse over to another web object (called rollovers) and reverts back to the original image on mouse out. Rollover images are preloaded into the page when it is loading, this ensures that the rollovers are displayed quickly. The onMouseOver and onMouseOut attributes of the link tag are used to make this functional.

    Demo:  Place your mouse over the image below to see its rollover effect


    Making Rollover Effect Image

    You have the following code:

    <a href="URL ADDRESS"><img src="URL OF THE FIRST IMAGE GOES HERE" onmouseover="this.src='URL OF THE SECOND IMAGE GOES HERE'" onmouseout="this.src='URL OF THE FIRST IMAGE GOES HERE'" /></a>

    Change the colored texts as it follows:

    1. URL ADDRESS

    This is the address where somebody will be sent when clicks on the image.
    Example, my blog address: http://www.fe-blogger.blogspot.com

    2. URL OF THE FIRST IMAGE GOES HERE

    Replace the orange text (two times) with the URL address of the image which will appear before you hover over it.

    3. URL OF THE SECOND IMAGE GOES HERE
    Replace the text in blue with the url of  the image that will appear when the cursor hovers over it.

    Now you can paste your image inside a blog gadget, going to Layout > click on Add a Gadget link (right side) > Select HTML/JavaScript from the pop-up window, then add it to your sidebar.

    You can also add it inside your post by going to New Post > Switch to HTML tab and then paste the code in the empty box.

    That's it. Enjoy ;)

    More aboutCreate A Rollover Image Effect (change image on mouseover)

    How to Backup/Restore template in new blogger interface?

    Posted by Unknown

    Backup restore new Blogger Template easily
    Here i'm saying about an important topic that i had posted early " How to Backup/Restore Blogger Template? ". But i'm going to show you How to Backup/Restore  Blogger Template in New Blogger Template . Now a days Blogger default interface is Upgraded New Blogger Interface. Backup/Restore Template is so important,So don't take this as a silly matter.
    Read Following see How to backup template in New Blogger Interface..


    How to Backup/Restore Template

    • Go to Blogger Account
    • Select Template [as shown in fig.]
    Backup restore new Blogger Template easilyBackup restore new Blogger Template easily
    • Click on the Button Backup/Restore  in Left top .
    •  A box appears [as shown in fig.]

    Backup restore new Blogger Template easily
    • As shown in the above fig. 
    • Click on Download Full Template to download Template.Save it
    • Click on the Browse to Restore the early downloaded Template.
    • That's all ..Enjoy with us...


    Check out other Blogger Tricks HERE and Blogger jquery Widget Generators HERE

    More aboutHow to Backup/Restore template in new blogger interface?

    Optimize your post title to H1 tags better SEO Blogger Hack

    Posted by Unknown

    Increase SEO with h1 tag Blogger hack
    This is an important SEO Blogger trick to increase SEO. Heading tags have a great importance in Search engine results, Heading tags helps Search engines to recognize what is important in your blog.Heading are form H1 to H6 .H1 tags have higher priority.So we are going to hack blogger template by changing H3 tags to H1 tags. By default blogger post title is in H3 tag,here is a trick to change it to H1 tag for more SEO.


    • Go to Blogger Account
    • Select Template -> Edit HTML [click Proceed
    • Find the code like below [Find easily using Crtl+F]
    • Or simply find <H3


    <h3 class='post-title entry-title'>
          <b:if cond='data:post.link'>
            <a expr:href='data:post.link'><data:post.title/></a>
          <b:else/>
            <b:if cond='data:post.url'>
              <b:if cond='data:blog.url != data:post.url'>
                <a expr:href='data:post.url'><data:post.title/></a>
              <b:else/>
                <data:post.title/>
              </b:if>
            <b:else/>
              <data:post.title/>
            </b:if>
          </b:if>
      </h3>
    • and Change it with <H1 [Change all H3 to H1]
    • Change all H3 tags with H1 tag
    • Done ..Wait for few weeks you can find the change in Google SERP.
    • Your Blog pages will show in Google Search Page.

    Update [21.11.2012] : I have noticed that this trick displays error in some webmaster like Bing. If you get error message from the webmaster then change the H1 tags which we changed before to H2.
    Note: Only change the H1 tags you changed earlier.
    Google Webmaster will not show error on this trick.

      I think you enjoyed this ..if so please share...
      More aboutOptimize your post title to H1 tags better SEO Blogger Hack

      Protect Your Blog posts from Copying Blogger Trick

      Posted by Unknown

      Stop copying blog content with css
      Copying blog posts or articles from sites/blogs on internet is a usual thing.Here i am going to share you how to protect your blogger posts/articles form getting Stolen.This is a trick to lock your text and the visitors of your blog can't select the text only they can read the text. If they cracked that method and select the text there is another trick to disable right click menu,so they can't copy text.. Enjoy...


      To view Demo click the link below:- Open this link and try to select text..Or do a right click..

      View Demo

      Copy the Following CSS codes to your Blog

      •  Go to Blogger Dashboard
      • Select Template->Edit HTML click Proceed    [or Use Alternate Way to copy CSS code]
      • Find ]]></b:skin>
      • Copy the following code  and save

      -moz-user-select:none;
      -webkit-user-select:none;
      -khtml-user-select:none;
      -ms-user-select:none;
      user-select:none;


      Disable Right Click

      • Copy the following code inside <head>
      <script src='http://netoopscodes.googlecode.com/svn/branches/Js files/disable right click.js' type='text/javascript'/>


      I think this article will surely help you...if you liked this please share...
      More aboutProtect Your Blog posts from Copying Blogger Trick

      HTML Character Count SEO Tool for Blogger

      Posted by Unknown

      HTML character count SEO tool for blogger
      HTML Character count Tool is a popular tool to count characters that is used for SEO.You can count characters in the following Tool.Character count is mainly used to count Blogger post title characters. In Google SERP(Search Engine Result Page), Google shows 61characters of title of blog post.So keep Blog Title less than or equal to 61 characters. Manual counting of characters in title with white spaces is, i think it is bit difficult So use this tool to count..


      I hope you are enjoyed with this article please share it...
      Thanks...

      More aboutHTML Character Count SEO Tool for Blogger

      15+ Smooth Jquery Scroll to Top widget generator for Blogger v.1

      Posted by Unknown

      jquery scroll to top widget generator blogger
      Jquery scrolling to top buttons help visitors to jump to top of page with smooth automatic scrolling.So the user/visitor of your blog can go to top of page with a single click.This smooth jquery scrolling makes your blog impressive.
      I created a Blogger widget generator for ease of use.Create your favorite scroll to top Button with a single click.


      To view demo look at right-bottom of this blog or Click on the following link


      I think you liked this generator,Check out our other awesome widget generators here.
      Don't forget to say thanks at least for appreciating us..  Also expect more form us.. thanks..

      I found that some sites copy our code,a notice for those Blog owners: please at-least say thanks or provide our blog link within your post. Thanks

      More about15+ Smooth Jquery Scroll to Top widget generator for Blogger v.1

      Add Facemoods Emoticons To Your Blogger Comments

      Posted by Unknown

      Here are some amazingly funny emoticons compatible with your Blogger comments - also with threaded commenting system! If you want to know how to add them, just follow the next steps:

      emoticons, smileys, blogger, tricks

      Step 1.

      Go to Dashboard - Template - Edit HTML - Proceed


      ...and select Expand Widget Template (don't forget to make a backup)

        Step 2. Search (using CTRL + F) for this code:

        • For previous commenting system: 
        <h4 id='comment-post-message'><data:postCommentMsg/></h4>
        • For threaded comments:
        <div class='post-footer-line post-footer-line-3'>

        Step 3. Add the below code just above it

        (for threaded comments, add the code after):

        <b:if cond='data:blog.pageType == "item"'>
        <div style=' width: 450px; text-align: left; border: 1px dashed #0084ce; background: transparent; padding: 10px; color:#000000; font-weight:bold; '>
        <img border='0' src='https://blogger.googleusercontent.com/img/b/R29vZ2xl/AVvXsEhGoD-ANA9wIwb-7NG7PTpHwMILwi5n1RD4codZ_L_7l7hugQtEDUGJTh8prkEcx2B22FXrcpt4W60WV1inn6D2LV_Wi74dOzo8XDB0vDEakkdgF8RLuXXODmSR_WColvn8YBjCEUW_-b35/s1600/fe-blogger.blogspot.com(1).gif'/> :a
        &#160;
        <img border='0' src='https://blogger.googleusercontent.com/img/b/R29vZ2xl/AVvXsEjmqw9b2Akf2HGdIS7ccZXLNIl-Kxa1X5CNpa58DQ7vfhz4WNts5Z1DMvSm8JhbAGEeBA3PBAvT7uAjeiCTNfV209WqhD07cErGy3X1VOBOKApluoz9-NVq_1ngiodvZBR2d5bXJQvuL84c/s1600/fe-blogger.blogspot.com+(2).gif'/> :b
        &#160;
        <img border='0' src='https://blogger.googleusercontent.com/img/b/R29vZ2xl/AVvXsEhHQ1ZJjDclbTpkN6H12G7Xf1ZYCTbxNcXhF0UoUrOzBd9wBwrfkltjWhx9t_17t3iwTmcaPxWSSQo0Jn4yi2jEghcWvrX2GFmTMm-kgI-440RxKGditN-Xxb5cI7sxKeFlAHKE0LqEosbZ/s1600/fe-blogger.blogspot.com(3).gif'/> :c
        &#160;
        <img border='0' src='https://blogger.googleusercontent.com/img/b/R29vZ2xl/AVvXsEiHMlYagHeazTQPpahzcCkDKEB2u1F8tlGdD2Zwn7saSHO7kvZmB6Bmq0DIMcOuRJD0soOetMl8TCRnXvF1IM3b_4MRZKZOeH6Nxz9t3dVUIiLEaP7G-0Yf-q0_OEyB3ThS0ufawp6swR1I/s1600/fe-blogger.blogspot.com(4).gif'/> :d
        &#160;
        <img border='0' src='https://blogger.googleusercontent.com/img/b/R29vZ2xl/AVvXsEiGNDeSl0mgwOdIahjOK0KVYSyViIYqdyg1tyo9U9cAPGE75G3q13aM_2swwtEYnwEAXy61jWeezhxz4AuIvPQ2QiP9q6amVrpsBrVyqtapanvRgZJ7n1k9tylupEyi3ncwFiwih0TpjhAN/s1600/fe-blogger.blogspot.com(5).gif'/> :e
        &#160;
        <img border='0' src='https://blogger.googleusercontent.com/img/b/R29vZ2xl/AVvXsEg4rgS70JIeVdH72XmdB-DMD0gVqMBN0Ck_olh92NXsPTCy3evorlCShfVDGon_abyCAEQRQSuf1PykTIXksOhbdK5rLzeTEXH5WVUIlfvQ3p0S_fBhLODoyKUwdDCPHeG2m63c-e6Bjyry/s1600/fe-blogger.blogspot.com(6).gif'/> :f
        &#160;
        <img border='0' src='https://blogger.googleusercontent.com/img/b/R29vZ2xl/AVvXsEhGRolLr9Os2ucUfRfnm6Iszvg38RuD2y7tj2RpVDFRJlJAnp5MpqNIuHVXeq6Tb97Fqwb1QCT4y-MAJPCsdzDXo2gb2NIWm7pg0vTuTkZ5zMT8OgxoB3Ea9Og3PUApe4cdtQJZckiFRnu7/s1600/fe-blogger.blogspot.com(7).gif'/> :g
        &#160;
        <img border='0' src='https://blogger.googleusercontent.com/img/b/R29vZ2xl/AVvXsEhpwVoL6kCwmM0PJZcQYjjxdjknp2iIlFETjAERgUkIdvyiw6ZIiJa98V8ATkoxgX_2BGard3SpenINwYX0tKIyXhhfP08gtlYAYYBRRYrCUXDZScSjUIFB9QJa8NdWfr-tKb3YbQ2b3CsL/s1600/fe-blogger.blogspot.com(8).gif'/> :h
        &#160;
        <img border='0' src='https://blogger.googleusercontent.com/img/b/R29vZ2xl/AVvXsEiubzUbcUTv4JkFW-kzf7UEgD0-Wg-Uc3Ibw64Ae-vXlkqL0gFwlb1ymq0ULevCqgBnWSD_FLf260S4i-31GUEumwMu6tN9vXRwJYRG5YvkFXWSgs72yFnik7SXQTyYRpFUL2V4wGSNRO7B/s1600/fe-blogger.blogspot.com(9).gif'/> :i
        &#160;
        <img border='0' src='https://blogger.googleusercontent.com/img/b/R29vZ2xl/AVvXsEhfiSdB0rYqCnu9z605qgCM24FfqKyVxmgOzkQPre8wYj_l_HsLy6qzIdAeHwYuXsOTAuHIiCLqQmiqxAao90oaaUOUQT2Iq4rgCPqAqO3oNLCVUxm2UjD7qWny-EnCVvra-TxHKYFStQPc/s1600/fe-blogger.blogspot.com(10).gif'/> :j
        &#160;
        <img border='0' src='https://blogger.googleusercontent.com/img/b/R29vZ2xl/AVvXsEjkuTvg0use8hL0k-t9Lko_vMS9H9HbccxMgeRxA0WzB8XKy4Zl694dGi9s3aGfJurt7DeMFZuiq6hCiDJf23jonFeJf46J7_18y-LvrJPB1vne_R6-WX8vEAH-v1HxVUJEC3f1MuIBitVd/s1600/fe-blogger.blogspot.com(11).gif'/> :k
        &#160;
        <img border='0' src='https://blogger.googleusercontent.com/img/b/R29vZ2xl/AVvXsEjTFhs5jUptqEcfZQdbl-NAeG7F90sMK-pGLgmRi7CgBgaYPUMnf1XwLujhMCNc6v8-cel4PLQJpq8-a4sr7QdBTqVpBYDcrK2RXJ_5ekn0Iovqi_jGw2fEAogQMM3IF9UorTN2Btk5RZ-1/s1600/fe-blogger.blogspot.com(12).gif'/> :l
        &#160;
        <img border='0' src='https://blogger.googleusercontent.com/img/b/R29vZ2xl/AVvXsEhy91EU8iMRDCLJ_2eFRNBoaZhfImjRe6v69G4mhpeUTx0hzlRMYAOfzqQUQUzQqxV1229efFFqAXvtPTR5pWuegGZZ14N3qzs6eiOpid2PpCNJEGvYuAZ5aDaoVBQU28DfTaWS4BtX_j5I/s1600/fe-blogger.blogspot.com(13).gif'/> :m
        &#160;
        <img border='0' src='https://blogger.googleusercontent.com/img/b/R29vZ2xl/AVvXsEgmJcCqD4SC7-8QPrItrfGGXIqfgkLyHeg8juyHRjiaXOLfsvInoJrZCChJwrDlrItKoY13kLklXyUWb7OOVq3B3wxRnvWAVxNkF6Xjz57Wxh-aLmJZHrric5pTNPbLswFnLCgko1tVqDD_/s1600/fe-blogger.blogspot.com(15).gif'/> :n
        &#160;
        <img border='0' src='https://blogger.googleusercontent.com/img/b/R29vZ2xl/AVvXsEgxq3DBB9EAMlE9qjN9F13jd3zcGqlA29zmHZG9Bv8ROtOchncs323vXfoVu0tA2bw21ojE8y9F2GKzi4XpfKlXUYpLXOfkiUOt9hfLgEnmYYO0HCjTWHnvJatRnOzBrsIII1ocncL_bUeQ/s1600/fe-blogger.blogspot.com(16).gif'/> :o
        &#160;
        <img border='0' src='https://blogger.googleusercontent.com/img/b/R29vZ2xl/AVvXsEjP5d0-jWsob1tf-NXPEwKELSEpCaHuv4wYXGvUbab3Zok8guYuHXreg1txhswMgTVdpZI01Wlvo5O6sHO3u560gGSWwBlS7KAw1haiNo8lvfT67KmK4VfdlPnqmyLVXt17hJ15fnFEXHKH/s1600/fe-blogger.blogspot.com(14).gif'/> :p
        &#160;
        <img border='0' src='https://blogger.googleusercontent.com/img/b/R29vZ2xl/AVvXsEg424HwV59aSlsDD16bA1MIA-HsdiLdE7asWkMI4KgrrrAbSTjjDrqz8OQOdTxIoic97vwGnbZGTPbdDbSB5Y7WpKoXsVOG1oq2EtiqdxecGaFNJZotWl-tANKvFuZNfSz_OhL2FaviMBBg/s1600/fe-blogger.blogspot.com(17).gif'/> :q
        &#160;
        <img border='0' src='https://blogger.googleusercontent.com/img/b/R29vZ2xl/AVvXsEg9m0ksj-ned5it2JRRakjzMjwC2b4LVhSPbOFxa00aePymHJNPI9Zk0O3hRtirH8oJwXsy_fvDPoOxQLgMFIkV6kUmgevspG7RtrW7XDX45aDrVfVZ6RhZ03ByGAfnLYeWXzeqwIxSeG2E/s1600/fe-blogger.blogspot.com(18).gif'/> :r
        &#160;
        <img border='0' src='https://blogger.googleusercontent.com/img/b/R29vZ2xl/AVvXsEghuBBAIcA6z4p-swdYES-T-IrO1w3gXd_Ed87uoEk9wWtbMNdJZJs7BceGjBe-Z1R2a8nS6UXSiPLW066BwRiz4OH-B50stJZCMnqQncQVmu4Z4iiEe20FSNyLQYnLx-iiAUB78hug8PPY/s1600/fe-blogger.blogspot.com(19).gif'/> :s
        &#160;
        <img border='0' src='https://blogger.googleusercontent.com/img/b/R29vZ2xl/AVvXsEgzhA-yCMuWybOrwR4mikKpDbLsacTbkFbdim8R6AqU6CU9E5-TX5c1wkzs9Y6GN9N4p9yX9e1rB6VxPBbkWvNnbCjHIj9KsbHTyViPpu-_2bDgBMYFsSflyyXtbsqFExtXeweo0faNvGzk/s1600/fe-blogger.blogspot.com(20).gif'/> :t   <a href='http://fe-blogger.blogspot.com/2012/05/add-facemoods-emoticons-to-your-blogger.html' style='color: rgb(30, 122, 183); font-size: x-small;'>Add smileys to Blogger + </a>
        </div></b:if>

        Step 4. Now search for this piece of code:

        </body>

        Step 5. And add the following code immediately above it:

        • For previous commenting system:
        <script type='text/javascript' src="http://fe-blogger.googlecode.com/svn/trunk/facemood emoticons.js"/>
        • For threaded comments: 
        <script type='text/javascript' src="http://fe-blogger.googlecode.com/svn/trunk/facemood emoticons threaded.js"/>

        Step 6. Save the Template. Now, enjoy your comments!

        More aboutAdd Facemoods Emoticons To Your Blogger Comments