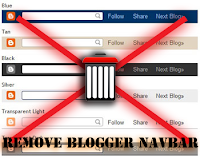
Frist time somebody creates a blog in blogger.com, a bar will show up at the very top of a blog page. This bar is known as the Blogger Navbar (Blogger Navigation Bar) and it usually appears by default at the top of every hosted Blogspot blog.
Blogger navbar functions include:
- [B] (blogger logo): takes you back to blogger's homepage
- Search Blog: you can make searches on the blog and results will appear directly on the page.
- Follow: you can follow the blog you're currently viewing (blog updates will appear on your Blogger dashboard at Reading List - if you're not logged, you'll see a Share link, which allows you to share you favorite blogs on social networks like Twitter, Facebook, Google buzz, and Google Reader)
- Report abuse: you can report a blog if you consider its content objectionable (e.g., pornography);
- NextBlog: takes you to a random, recently-updated Blogger blog.
- email address@: If you are logged in to your account, you'll see your own address here. Other viewers will see their own email addresses, or none at all if they aren't logged in.
- Post: Direct link to the post editor
- Design: this link takes you to Page Elements, where you can add gadgets/widgets for your blog
- Sign In/Out: This displays the appropriate option, depending on whether you're logged in or not.
Blogger navbar is available in several colors, and is configured in the Template tab in Blogger's interface.
It can be useful but the only real disadvantage is visual. If you have customized design, Navbar usually doesn't fit in.
In this tutorial, I'll show you how to remove it or add a peek-a-boo effect.
Removing/Hiding the Blogger Navbar
Step 1. Go to: Dashboard > Template > Edit HTML:
... select the "expand widget templates" box
Step 2. Find (CTRL + F) the following line:
]]></b:skin>
#navbar {
height: 0px;
visibility: hidden;
display: none;
}
Step 4. Save your Template.
 There's another way of showing a Navbar. It is called
"Hover Peek-a-boo Blogger Navbar":
The navbar will only appear when you hover around the area on the top. To see it in action, take a look at this demo
Add a Peek-a-Boo Effect to Blogger/Blogspot Navbar
Step 1. Login to your Blogger Dashboard, then go to Design >> Edit HTML > check "expand widget templates"
Step 2. Search for the following piece of code:
]]></b:skin>
Step 3. Add the following code just above it:
#navbar-iframe{opacity:0.0;filter:alpha(Opacity=0)}
#navbar-iframe:hover{opacity:1.0;filter:alpha(Opacity=100, FinishedOpacity=100)
Step 4. Save the template... and you're done!
If you have any questions, leave a comment below.


.jpg)

{ 0 comments... read them below or add one }
Post a Comment