Showing posts with label Blog Design. Show all posts

How To Add Snow In The Background of Your Blog Using CSS

Posted by Unknown

falling snow, snow, winter background, bloggerToday we’re going to go over a super simple CSS technique that you can use to make it snow on your Blogger blog. It seems particularly attractive since it doesn't require scripts, only CSS and three small images.

An advantage of this method is that by not using scripts doesn't overload the blog, the disadvantage is that users with not so modern browsers, will not be able to see it (in Internet Explorer works for version 10 and up).

The snow will fall in the background of the blog, which, in addition, prevent interfering with links or content (because the flakes are images), also prevent blocking the visibility of the content of the blog.

You can see the demo in this test blog.


How To Add Falling Snow To Blogger Blogspot

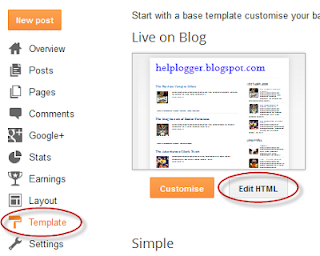
Step 1. Go to Template and click on the Edit HTML button:


Step 2. Click the small arrow on the left of <b:skin>...</b:skin> to expand the style (screenshot 1), then click anywhere inside the code area to search (using CTRL + F) for the ]]></b:skin> tag (screenshot 2) and add this code just above it:

/* Snow falling for Blogger
----------------------------------------------- */
@keyframes snow {
0% {background-position: 0px 0px, 0px 0px, 0px 0px;}
100% {background-position: 500px 1000px, 400px 400px, 300px 300px;}
}

@-moz-keyframes snow {
0% {background-position: 0px 0px, 0px 0px, 0px 0px;}
100% {background-position: 500px 1000px, 400px 400px, 300px 300px;}
}

@-webkit-keyframes snow {
0% {background-position: 0px 0px, 0px 0px, 0px 0px;}
100% {background-position: 500px 1000px, 400px 400px, 300px 300px;}
}

@-ms-keyframes snow {
0% {background-position: 0px 0px, 0px 0px, 0px 0px;}
100% {background-position: 500px 1000px, 400px 400px, 300px 300px;}
}

#falling-snow {
background-image: url(https://blogger.googleusercontent.com/img/b/R29vZ2xl/AVvXsEgUtlqHl9Djs5p0pte_rCn6D5-mhNtCdTr-bSnoeJBZaRQc5NjAQiBUgWhqEKNm5dJIUraYkbD_xuDy3ItQGZPzDcRwNzvX1iezyMOAhiTZFIJLqgNwzb7_MikvtsW6TuY9-zGKYswJRra6/s1600/snow.png), url(https://blogger.googleusercontent.com/img/b/R29vZ2xl/AVvXsEgTlybuN5heKdi7f4j31m3QfGWtTgI4csfK0Y21V4nZASnbV9Wj4fsSDzi0-cnkcUNvT_SZH_HcoCUe-GRkbnBJJItSUEDiYmepQh2IWb-XqfQyWJbXOo4KO_Djq_xScBXj6s5ZgXOvK_j5/s1600/snow3.png), url(https://blogger.googleusercontent.com/img/b/R29vZ2xl/AVvXsEhqLaCtDaG6Xfwo-OmySdSzgbIqvnWVTqCKW-B5Lwi4yc5XXO8paGNdTGHnCrLqz5QHV6YmqtqboofkTctGGl_IGTdrjf6TXWvjU50EPYi0hIz3UjhosKywqIAetfjxZA5M1W9CrWJGoeLT/s1600/snow2.png);
-webkit-animation: snow 20s linear infinite;
-moz-animation: snow 20s linear infinite;
-ms-animation: snow 20s linear infinite;
animation: snow 20s linear infinite;
}


Screenshot 1: 


Screenshot 2:


Step 3. Now, search (CTRL + F) for the <body> tag or this line:

<body expr:class='&quot;loading&quot; + data:blog.mobileClass'>

Step 4. And just below, add this:

<div id='falling-snow'>

Step 5. Finally, find the </body> tag (CTRL + F) and add the following just above it:

</div>

Step 6. Save the changes and that's it. Enjoy!!! :)

As you can see this tricks is very simple and easy to install, does not block the visibility of blog's content and the best is that it has no scripts, only CSS and nothing else.
More aboutHow To Add Snow In The Background of Your Blog Using CSS

Scriptaculous image slider/carousel for Blogger

Posted by Unknown

This is a very nice carousel slideshow made by Brian R. Miedlar which shows a gallery of images having a sliding effect that returns to the beginning once it gets to the last image.

If you need to see this carousel in action, please visit this demo blog.


To add this image carousel on your Blogger blog, follow the steps below:

image carousel

Step 1. Login to your Blogger Dashboard, go to Template and click on the Edit HTML button:


Step 2. Search using CTRL + F for the </head> tag.


Step 3. Just above the </head> tag, add this code:

<script src='http://www.google.com/jsapi'></script>
<script>
google.load("prototype","1.7.0.0");
google.load("scriptaculous", "1.9.0");
</script>


<script language='javascript' src='http://fe-blogger.googlecode.com/svn/trunk/Image Carousel/os.js' type='text/javascript'/>
<script language='javascript' src='http://fe-blogger.googlecode.com/svn/trunk/Image Carousel/carousel.js' type='text/javascript'/>
<script language='javascript' src='http://fe-blogger.googlecode.com/svn/trunk/Image Carousel/application.js' type='text/javascript'/>

Note: If you already have Scriptaculous and Prototype, it's not necessary adding the code in red.

Step 4. Now search for the following code:
]]></b:skin>
And just above it, add these styles:
.carousel {
position:relative;
clear:both;
left:20px; /* Distance from left */
margin-top:10px;
margin-bottom:20px;
border:2px solid #000; /* Carousel border */
background-color:#333333; /* Background color */
}
.carousel .navButton { cursor:pointer; display:block;
text-indent:-9999px;
background-repeat:none;
z-index:10;
}
.carousel .container {
position:absolute;
overflow:hidden;
}
.carousel .items {
position:absolute;  }
#Carousel2 {
height:88px; /* height of the container */
width:685px; /* width of the container */
}
#Carousel2 .container {
left:26px;
top:12px;
width:630px; /* width of the images container */
height:100px; /* height of the images container */
}
#Carousel2 .items { top:0; left:2px;
width:1700px; /* overall width of all the thumbnails */
}
#Carousel2 .item { height:70px; width:70px; float:left; clear:right; }
#Carousel2 .item .icon img { position:relative; left:0px; width:65px !important; height:65px; cursor:pointer;}
#Carousel2 .navButton { position:absolute; bottom:0px; width:24px; height:87px; }
#Carousel2 .navButton.previous { left:0px; background-image:url(https://blogger.googleusercontent.com/img/b/R29vZ2xl/AVvXsEjYBHo1wd55Mcemdpeb2vXyzodBEzQSpUvA97ulrZmXtukEiOgRiK64BlkoJreB1sq65e8wJ7lKoUE06z4mnF-wshpmo4Nx8SubN6hobYqmensNWYzTVQ1z7Mqg5yC440d92RLCpSOMwxk/s1600/button-left.png); }
#Carousel2 .navButton.next { right:2px; background-image:url(https://blogger.googleusercontent.com/img/b/R29vZ2xl/AVvXsEiiubHWWQUlt4GCtvFptlcKsh9f3qj3mtCPJNmG9Fir5WRW8uZ3trXLal2Jzofaj5IbImQbdNv2yFWbgS0voJYL1YP_vpkFjGVl9vXHqFHm4jKhJcj41yfxP8DaGXBaq3vDvG3O76NTO6g/s1600/button-right.png); }
#Carousel2 .item .key { display:none;}
#Carousel2 .item .picture { display:none;}
Here, I have put some styles in green that can be customized as you wish, such as the border color and the background color. The arrows are images, so if you want changing their color or use other, you have to change the two URLs in blue.

The width of the carousel is of 685px, so below the header might look good. If you want to change the length then you have to change the /* width of the container */ (which is the size of the entire carousel), the /* width of the images container*/ (which is the area that shows the thumbnails) and the /* overall width of the thumbnails */ which is the actual width that occupy all the thumbnails together.

Step 5. Save the Template.

Step 6. Go to Layout > click on Add a Gadget link > choose HTML/Javascript from the pop-up box and paste the structure of the carousel:
<div id="Carousel2" class="carousel">
<div class="button navButton previous" style="display:none;">Back</div>
<div class="button navButton next" style="display:none;">Forward</div>
<div class="container">
<div class="items">

<div class="item">
<div class="key caption">Thumb</div>
<div class="icon">
<a href="link URL"><img width="65" height="65" src="image URL" /></a></div>
<div class="picture"></div>
</div>

<div class="item">
<div class="key caption">Thumb</div>
<div class="icon">
<a href="link URL"><img width="65" height="65" src="image URL" /></a></div>
<div class="picture"></div>
</div>

<div class="item">
<div class="key caption">Thumb</div>
<div class="icon">
<a href="link URL"><img width="65" height="65" src="image URL" /></a></div>
<div class="picture"></div>
</div>

<div class="item">
<div class="key caption">Thumb</div>
<div class="icon">
<a href="link URL"><img width="65" height="65" src="image URL" /></a></div>
<div class="picture"></div>
</div>

<div class="item">
<div class="key caption">Thumb</div>
<div class="icon">
<a href="link URL"><img width="65" height="65" src="image URL" /></a></div>
<div class="picture"></div>
</div>

<div class="item">
<div class="key caption">Thumb</div>
<div class="icon">
<a href="link URL"><img width="65" height="65" src="image URL" /></a></div>
<div class="picture"></div>
</div>

<div class="item">
<div class="key caption">Thumb</div>
<div class="icon">
<a href="link URL"><img width="65" height="65" src="image URL" /></a></div>
<div class="picture"></div>
</div>

<div class="item">
<div class="key caption">Thumb</div>
<div class="icon">
<a href="link URL"><img width="65" height="65" src="image URL" /></a></div>
<div class="picture"></div>
</div>

<div class="item">
<div class="key caption">Thumb</div>
<div class="icon">
<a href="link URL"><img width="65" height="65" src="image URL" /></a></div>
<div class="picture"></div>
</div>

<div class="item">
<div class="key caption">Thumb</div>
<div class="icon">
<a href="link URL"><img width="65" height="65" src="image URL" /></a></div>
<div class="picture"></div>
</div>

<div class="item">
<div class="key caption">Thumb</div>
<div class="icon">
<a href="link URL"><img width="65" height="65" src="image URL" /></a></div>
<div class="picture"></div>
</div>

<div class="item">
<div class="key caption">Thumb</div>
<div class="icon">
<a href="link URL"><img width="65" height="65" src="image URL" /></a></div>
<div class="picture"></div>
</div>

<div class="item">
<div class="key caption">Thumb</div>
<div class="icon">
<a href="link URL"><img width="65" height="65" src="image URL" /></a></div>
<div class="picture"></div>
</div>

<div class="item">
<div class="key caption">Thumb</div>
<div class="icon">
<a href="link URL"><img width="65" height="65" src="image URL" /></a></div>
<div class="picture"></div>
</div>

<div class="item">
<div class="key caption">Thumb</div>
<div class="icon">
<a href="link URL"><img width="65" height="65" src="image URL" /></a></div>
<div class="picture"></div>
</div>

<div class="item">
<div class="key caption">Thumb</div>
<div class="icon">
<a href="link URL"><img width="65" height="65" src="image URL" /></a></div>
<div class="picture"></div>
</div>

<div class="item">
<div class="key caption">Thumb</div>
<div class="icon">
<a href="link URL"><img width="65" height="65" src="image URL" /></a></div>
<div class="picture"></div>
</div>

<div class="item">
<div class="key caption">Thumb</div>
<div class="icon">
<a href="link URL"><img width="65" height="65" src="image URL" /></a></div>
<div class="picture"></div>
</div>

<div class="item">
<div class="key caption">Thumb</div>
<div class="icon">
<a href="link URL"><img width="65" height="65" src="image URL" /></a></div>
<div class="picture"></div>
</div>

</div>
</div>
</div>

Add the URLs of the links and the URLs of the images. The link URL is optional if you want to link the images to some posts.

If you add more images or remove some, you also need to change the width of the thumbnails, otherwise some pictures will appear behind the others.

To add more pictures, just add before the </div> in red a piece of code like this:
<div class="item">
<div class="key caption">Thumb</div>
<div class="icon">
<a href="link URL"><img width="65" height="65" src="image URL" /></a></div>
<div class="picture"></div>
</div>
To align the gadget just change the distance from the left (in green) to another value.
More aboutScriptaculous image slider/carousel for Blogger

How to Add a Tiny jQuery Circleslider to Blogger

Posted by Unknown

Tiny Circleslider is a small jQuery plugin that generates a circular carousel of images.

There is noting complicated about using this type of carousel, however when it's about customizing it, it's necessary to use a bit of arithmetic. All these details can be found in the author's homepage, so I'll just limit myself to show you the basics.


Obviously, we need to add the javascript jQuery library in our template:

Step 1. From your Blogger's dashboard, go to Template > press the Edit HTML button


Step 2. Search for the </head> (CTRL + F) tag and just above it, add the following code:
<script src='http://ajax.googleapis.com/ajax/libs/jquery/1.10.2/jquery.min.js' type='text/javascript'/>
<script src="http://fe-blogger.googlecode.com/svn/trunk/jquery.tinycircleslider.min.js"/>
We would lack the CSS styles that we need to add above the </head> tag as well:
<style>
  #rotatescroll { /* is the rectangle container */
    height: 300px;
    position: relative;
    width: 300px;
  }
  #rotatescroll .viewport { /* is the rectangle containing the images */
    height: 300px;
    position: relative;
    margin: 0 auto;
    overflow: hidden;
    width: 300px
  }
  #rotatescroll .overview { /* is the list with the images */
    left: 0;
    list-style: none;
    margin: 0;
    padding: 0;
    position: absolute;
    top: 0;
  }
  #rotatescroll .overview li { /* each item of the list */
    float: left;
    height: 300px;
    position: relative;
    width: 300px;
  }
  #rotatescroll .overlay { /* the image with the circle overlapping the list */
    background: transparent url(https://blogger.googleusercontent.com/img/b/R29vZ2xl/AVvXsEgcq_PkD5Hw4RthyphenhyphenNswjgAmUP05Zwm8GTYHRvc70Z_t4KaPuyvFVrldyXfWCbhh4HPbyoZKFHUwRGREFLxjCwH6V4fN6IIwGzl5gZvimHVeXH4XNFjWJSgEhz-tkTmbFMWB5aeE1wgeRW4f/s1600/bg-rotatescroll.png) no-repeat 0 0;
    height: 300px;
    left: 0;
    position: absolute;
    top: 0;
    width:300px;
  }
  #rotatescroll .thumb { /* the red circle that allows us to navigate */
    background:transparent url(https://blogger.googleusercontent.com/img/b/R29vZ2xl/AVvXsEh1PSdIYf1RAOKwGi2m6CjixrZ-qO_a1IPaTg6dDUDMs57ofzU7k-3GMRzzL0Z8Xckt_JcTdjdSeiTeREUan4ohchUvq_4vrYrLnkcVXzg66kkVIsU2qBjTNhwM5_j7qKWt4Ty-0ITt3hYN/s1600/bg-thumb.png) no-repeat 0 0;
    cursor: pointer;
    height: 26px;
    left: 137px;
    position: absolute;
    top: -3px;
    width: 26px;
    z-index: 200;
  }
  #rotatescroll .dot { /* the points indicating the position of each image */
    background: transparent url(https://blogger.googleusercontent.com/img/b/R29vZ2xl/AVvXsEhCce_SYe4z80g25IVD1A3RBWxR-m3ebSAAKYmBrrGicH3LbYt-Wj2-j7dpKQmhfeXuwBo8rZT513OH0OY2L5-S5EmCrZO2qUSm-T2RHeJVugET2il46w3vY0eu3ettLgXrnI6GVdRmSkoR/s1600/bg-dot.png) no-repeat 0 0;
    display: none;
    height: 12px;
    left: 155px;
    position: absolute;
    top: 3px;
    width: 12px;
    z-index: 100;
  }
  #rotatescroll .dot span { /* are hidden by default */
    display: none;
  }
</style>
Screenshot
Step 3. Now here's the HTML that has to be added to where we want to display the carousel.
Create a New post and paste on the HTML section, the code below:
<div id="rotatescroll">
  <div class="viewport">
    <ul class="overview">
      <li><img src="imageURL" /></li>
      <li><img src="imageURL" /></li>
      <li><img src="imageURL" /></li>
      <li><img src="imageURL" /></li>
      <li><img src="imageURL" /></li>
    </ul>
  </div>
  <div class="dot"></div>
  <div class="overlay"></div>
  <div class="thumb"></div>
</div>

<script type="text/javascript">
$(document).ready(function(){ $('#rotatescroll').tinycircleslider(); });
$('#rotatescroll').tinycircleslider({ interval: true, snaptodots: true });
</script>
Screenshot

Note: replace the imageURL text with the URL of your images

and here are other options that could be added, separated by commas:

snaptodots - false if you want no dots to be shown when dragging them
hidedots - false if you want to display the internal points (by default is true)
intervaltime - is the time between slides (by default 3500)
radius - defines the size of the circle (by default is 140)
More aboutHow to Add a Tiny jQuery Circleslider to Blogger

Before/After Photo Effect with jQuery

Posted by Unknown

If you have a design or makeup blog, or if you are using before and after image comparison, this script will surely be very useful for you.

In this tutorial we'll learn how to add the Before/After plugin, a script that works with jQuery and displays two pictures dynamically for comparing them at the same time. By dragging sideways a small bar we can see both images that are being compared.

See this Brittany Murphy pic before and after photoshop:

before
after

Implementing this script is simple, we just need jQuery, the Before/After script, and the two images that we are going to compare.

How to add the Before/After plugin to Blogger


Step 1. Go to Template > Edit HTML and before </head> (CTRL + F to find it) paste the following:
<script src='http://ajax.googleapis.com/ajax/libs/jquery/1.10.2/jquery.min.js' type='text/javascript'/>
<script src='http://http://code.jquery.com/ui/1.10.3/jquery-ui.js' type='text/javascript'/>
<script src='http://fe-blogger.googlecode.com/svn/trunk/jquery.beforeafter.min.js' type='text/javascript'/>
<script type='text/javascript'>
$(function(){
$(&#39;#beforeafter1&#39;).beforeAfter({showFullLinks : true});
});
</script>
Step 2. Click on the Save template button
Note: if the above script doesn't work for you, add it above the </body> tag. Also please verify if you have added jQuery in your template (if you did so, then remove the line in green)

Step 3. Go to Layout, add a HTML/Javascript gadget and paste this code inside the empty box:
<div id='beforeafter1'>
<div><img alt='before' src='URL of the first image' width='500' height='291'/></div>
<div><img alt='after' src='URL of the second image' width='500' height='291'/></div>
</div>
Add the URL of the first image that is the Before image, and the URL of the second image that is the After image.

It is important that you have specified the width and height of each picture so that they work on all browsers.
If you want to add more images just change the ID of the container, in this case the container is called beforeafter1 so you need to change it to beforeafter2 and so on, although you can choose any name as long as all are different.

And in the first code to paste, add another line like this one in blue:
<script src='http://ajax.googleapis.com/ajax/libs/jquery/1.10.2/jquery.min.js' type='text/javascript'/>
<script src='http://http://code.jquery.com/ui/1.10.3/jquery-ui.js' type='text/javascript'/>
<script src='http://fe-blogger.googlecode.com/svn/trunk/jquery.beforeafter.min.js' type='text/javascript'/>
<script type='text/javascript'>
$(function(){
$(&#39;#beforeafter1&#39;).beforeAfter({showFullLinks : true});
$(&#39;#beforeafter2&#39;).beforeAfter({showFullLinks : true});
});
</script>
You can add as many before/after images as you like as long as all containers have a different ID and the corresponding lines are added in the script.
Below each photo container are the "Show only Before" and "Show only after" links that when you click on them, the complete pictures will be shown. If you want to hide these links, then just change true to false in the first code and they will not be displayed anymore.

Note: if you see white space around the drag icons, then search for this code in your template:
   <Group description="Images" selector=".main-inner">
     <Variable name="image.background.color" description="Background Color" type="color" default="#ffffff" value="#ffffff"/>
... and change the #ffffff value in red to transparent.

Autor: Catch my fame
More aboutBefore/After Photo Effect with jQuery

Spacegallery: image gallery/slideshow made with jQuery

Posted by Unknown

There are many types of galleries for images that we find on the net, but we rarely see one showing images so differently like this one.
image gallery with jQuery for blogger

Those using Mac OS X will surely find a lot of similarity with TimeMachine and those who don't, I'm sure will enjoy this type of effect for viewing images.

I'm talking about Spacegallery, an image gallery done with jQuery in which images are being displayed one after another when you click on them. You can see in the example below.


To use this gallery follow the steps below:

Step 1. Log in to your Blogger Dashboard, click on your blog and then go to Template and click on the Edit HTML button.

Step 2. Search using CTRL + F keys for the </head> tag and before it paste the following:
<script src='http://ajax.googleapis.com/ajax/libs/jquery/1.10.2/jquery.min.js' type='text/javascript'/>
<script src='http://fe-blogger.googlecode.com/svn/trunk/SpaceGallery/eye.js' type='text/javascript'/>
<script src='http://fe-blogger.googlecode.com/svn/trunk/SpaceGallery/utils.js' type='text/javascript'/>
<script src='http://fe-blogger.googlecode.com/svn/trunk/SpaceGallery/spacegallery.js' type='text/javascript'/>

<script type='text/javascript'>
//<![CDATA[
(function($){
var initLayout = function() {
var hash = window.location.hash.replace('#', '');
var currentTab = $('ul.navigationTabs a')
.bind('click', showTab)
.filter('a[rel=' + hash + ']');
if (currentTab.size() == 0) {
currentTab = $('ul.navigationTabs a:first');
}
showTab.apply(currentTab.get(0));
$('#myGallery').spacegallery({loadingClass: 'loading'});
};

var showTab = function(e) {
var tabIndex = $('ul.navigationTabs a')
.removeClass('active')
.index(this);
$(this)
.addClass('active')
.blur();
$('div.tab')
.hide()
.eq(tabIndex)
.show();
};

EYE.register(initLayout, 'init');
})(jQuery)
//]]>
</script>
Screenshot
Note: if you have already added jQuery in your template, then delete the line in red.

Step 3. Search for ]]></b:skin> (CTRL + F) and when you found it, click on the arrow next to it:


Paste just above ]]></b:skin> the following CSS style:
#myGallery {
width: 100%;
height: 400px;
}
#myGallery img {
border: 2px solid #52697E;
}
a.loading {
background: url(https://blogger.googleusercontent.com/img/b/R29vZ2xl/AVvXsEj2rEUIcRdapOTUOgzksuao6Ks3OJQrSoTN3Q4Q5bxavfRvLrY2Jckt_RHopp19WIoEugwEMH5jlpdMYGjJfalMIk37MFB-IQNePtJzTVoWf7s0OgypHJwR_N92tw2r1uPybGNWxYaGHEgI/s1600/ajax_small.gif) no-repeat center;
}
.spacegallery {
position: relative;
overflow: hidden;
}
.spacegallery img {
position: absolute;
left: 50%;
}
.spacegallery a {
position: absolute;
z-index: 1000;
display: block;
top: 0;
left: 0;
width: 100%;
height: 100%;
}

Step 4. Click on the Save template button

Step 5. Finally go to Layout > Add a Gadget > HTML/Javascript and copy-paste the code below:
<div class="spacegallery" id="myGallery">
<img src="Image URL"/>
</div>
Note: In case you want to add this slideshow inside a post, then create a new post and paste the code in the HTML section

Replace the Image URL text with the URLs of the images of your gallery, keeping in mind that the last image is the first to be displayed.

And so you can enjoy this simple image gallery on your blog, and although it has no display options or settings, is without a doubt a gallery that will draw the attention of your readers.
More aboutSpacegallery: image gallery/slideshow made with jQuery

Add Keyboard Keys Effect To Your Text in Blogger with CSS

Posted by Unknown

For many of us the design and the template are the most important, making our readers be more interested and coming back to our blog. In this tutorial, I will show you how to create a keyboard keys effect only with CSS. It is not necessary to add an image, so that your blog will load faster.

how to add keyboard keys with css in blogger

How to Add Keyboard Keys to Blogger


Step 1: From Blogger Dashboard, go to Template > Edit HTML

edit the html of blogger template

Step 2: Look for this line (Ctrl + F)
]]></b:skin>
Screenshot
Click on the arrow to expand the code

Step 3: Just above ]]></b:skin> paste this CSS code:

kbd{
border:1px solid gray;
font-size:1.2em;
box-shadow:1px 0 1px 0 #eee, 0 2px 0 2px #ccc, 0 2px 0 3px #444;
-webkit-border-radius:3px;
-moz-border-radius:3px;
border-radius:3px;
margin:2px 3px;
padding:1px 5px;
}
Step 4: Save the change made.

Now the only thing left to do is adding the tags to the desired text to make it look as it would be inside of the keyboard keys.

For this you need to create a new post, write the text on which you want to apply the style and then switch to HTML - where you have to add before and after it, the following HTML tags:

<kbd>Ctrl</kbd> + <kbd>F</kbd>

Screenshot
text with keyboard key effect

And, it will be visible in your post as:

Ctrl + F
More aboutAdd Keyboard Keys Effect To Your Text in Blogger with CSS

Page peel effect using jQuery

Posted by Unknown

Page Peel is a popular page flip effect that when your cursor is passing over it will show "what's behind" as if it would be a book.
There are many ways to do this, many of them use flash files which makes it less customizable, however, the one that we will see in this post is made with jQuery.

Regularly the content that is "behind" it is an image for subscribing to feed but you can put any image and link to any page.
page peel, blogger gadgets
Demo

You can see an example in this demo blog.

To add this page curl effect on your blog: 


1. Go to Template > Edit HTML and before </head> paste the script:
<script src='http://ajax.googleapis.com/ajax/libs/jquery/1.10.2/jquery.min.js' type='text/javascript'/>

<script>
//<![CDATA[
$(document).ready(function(){
$("#pageflip").hover(function() {
$("#pageflip img , .msg_block").stop()
.animate({
width: '307px',
height: '319px'
}, 500);
} , function() {
$("#pageflip img").stop()
.animate({
width: '50px',
height: '52px'
}, 220);
$(".msg_block").stop()
.animate({
width: '50px',
height: '50px'
}, 200);
});
});
//]]>
</script>
2. Then before ]]></b:skin> paste these styles:
/* Page Flip
----------------------------------------------- */
#pageflip {
position: relative;
right: 0;
top: 0px; /* Change to 30px if you have the navbar (navigation bar) */
float: right;
z-index:9;
}
#pageflip img {
width: 50px;
height: 52px;
z-index: 99;
position: absolute;
right: 0;
top: 0;
-ms-interpolation-mode: bicubic;
}
#pageflip .msg_block {
width: 50px;
height: 50px;
overflow: hidden;
position: absolute;
right: 0;
top: 0;
background: url(http://oi44.tinypic.com/2hheno6.jpg) no-repeat right top;
}
#pageflipMirror {
position: static;
right: 0;
top: 0;
float: right;
}
3. Finally, paste after <body> or:
<body expr:class='&quot;loading&quot; + data:blog.mobileClass'>
The following code:
<div id='pageflip'>
<a href='http://name-of_your_blog.blogspot.com/atom.xml'>
<img src='http://oi40.tinypic.com/10fqnav.jpg' style='width: 50px; height: 52px; overflow-x: hidden; overflow-y: hidden;'/></a>
<div class='msg_block' style='width: 50px; height: 50px; overflow-x: hidden; overflow-y: hidden; '/>
</div>
In blue you will see a URL - this is the URL of the image that, in this case, is an invitation to subscribe to the feed. You can change it later to another (should be of the same size) if you want.
In red you can see where the name of your blog should be added, that will be the link to the feed of your blog when the user is giving a click on the image behind, but you can put any URL in case you want to link to another page.

And that's it. Save the template.

Remember that uses jQuery, so you should only have one version of it, and if you use Scriptaculous or Mootools, you should apply some changes.
More aboutPage peel effect using jQuery

Customize the scroll bar (scrollbar) with JScrollPane

Posted by Unknown

JScrollPane is a jQuery script that allows you to change the blog' scroll bar, ie the browser scrollbar.
Although we can use CSS to change it, the problem is that is not standardized, because with CSS we can make it work only in Chrome and Safari; and in the case of Internet Explorer it also has its own code but obviously it only works in that browser (I don't know which versions). So what we will do then is to give a new look to the scrollbar but by using jQuery, so the change will be visible in all browsers.


Demo

You can see an example in this test blog where the scroll bar has a different shape and color.

How to change the scrollbar on Blogger


1. Go to Template > Edit HTML and before </head> paste this code:
<script src='//ajax.googleapis.com/ajax/libs/jquery/1.10.2/jquery.min.js' type='text/javascript'/>

<style>
.jspContainer {overflow: hidden;position: relative;}.jspPane {position: absolute;}
.jspVerticalBar {position: absolute;top: 0;right: 0;width: 16px;height: 100%;background: #ccc;}
.jspHorizontalBar {position: absolute;bottom: 0;left: 0;width: 100%;height: 16px;background: #ccc;}
.jspVerticalBar *,.jspHorizontalBar * {margin: 0;padding: 0;}
.jspCap {display: none;}.jspHorizontalBar .jspCap {float: left;}

.jspTrack {
background: #fff; /* background color of the bar */
position: relative;
}
.jspDrag {
background: #CC0000; /* Color of the scrollbar */
position: relative;
top: 0;
left: 0;
cursor: pointer;
}
.jspHorizontalBar .jspTrack,
.jspHorizontalBar .jspDrag {
float: left;
height: 100%;
}
.jspArrow {
background: #888; /* The color of the scrollbar limits */
text-indent: -20000px;
display: block;
cursor: pointer;
}
.jspArrow.jspDisabled {
cursor: default;
background: #333; /* Color of the limits when the srollbar is reaching them */
}
.jspVerticalBar .jspArrow {
height: 16px;
}
.jspHorizontalBar .jspArrow {
width: 16px;
float: left;
height: 100%;
}
.jspVerticalBar .jspArrow:focus {outline: none;}.jspCorner {background: #eeeef4;float: left;height: 100%;}* html .jspCorner {margin: 0 -3px 0 0;}
html, body {
height: 100%;
margin: 0;
padding: 0;
}
#blog-container {
height: 100%;
margin: 0;
padding: 0;
overflow: auto;
}
</style>
<script>
//<![CDATA[
/*! Copyright (c) 2013 Brandon Aaron (http://brandonaaron.net)
* Licensed under the MIT License (LICENSE.txt).
* Version: 3.1.3
*/

(function (factory) {
if ( typeof define === 'function' && define.amd ) {
define(['jquery'], factory);
} else if (typeof exports === 'object') {
module.exports = factory;
} else {
// Browser globals
factory(jQuery);
}
}(function ($) {

var toFix = ['wheel', 'mousewheel', 'DOMMouseScroll', 'MozMousePixelScroll'];
var toBind = 'onwheel' in document || document.documentMode >= 9 ? ['wheel'] : ['mousewheel', 'DomMouseScroll', 'MozMousePixelScroll'];
var lowestDelta, lowestDeltaXY;

if ( $.event.fixHooks ) {
for ( var i = toFix.length; i; ) {
$.event.fixHooks[ toFix[--i] ] = $.event.mouseHooks;
}
}

$.event.special.mousewheel = {
setup: function() {
if ( this.addEventListener ) {
for ( var i = toBind.length; i; ) {
this.addEventListener( toBind[--i], handler, false );
}
} else {
this.onmousewheel = handler;
}
},

teardown: function() {
if ( this.removeEventListener ) {
for ( var i = toBind.length; i; ) {
this.removeEventListener( toBind[--i], handler, false );
}
} else {
this.onmousewheel = null;
}
}
};

$.fn.extend({
mousewheel: function(fn) {
return fn ? this.bind("mousewheel", fn) : this.trigger("mousewheel");
},

unmousewheel: function(fn) {
return this.unbind("mousewheel", fn);
}
});

function handler(event) {
var orgEvent = event || window.event,
args = [].slice.call(arguments, 1),
delta = 0,
deltaX = 0,
deltaY = 0,
absDelta = 0,
absDeltaXY = 0,
fn;
event = $.event.fix(orgEvent);
event.type = "mousewheel";
if ( orgEvent.wheelDelta ) { delta = orgEvent.wheelDelta; }
if ( orgEvent.detail ) { delta = orgEvent.detail * -1; }
if ( orgEvent.deltaY ) {
deltaY = orgEvent.deltaY * -1;
delta = deltaY;
}
if ( orgEvent.deltaX ) {
deltaX = orgEvent.deltaX;
delta = deltaX * -1;
}
if ( orgEvent.wheelDeltaY !== undefined ) { deltaY = orgEvent.wheelDeltaY; }
if ( orgEvent.wheelDeltaX !== undefined ) { deltaX = orgEvent.wheelDeltaX * -1; }
absDelta = Math.abs(delta);
if ( !lowestDelta || absDelta < lowestDelta ) { lowestDelta = absDelta; }
absDeltaXY = Math.max(Math.abs(deltaY), Math.abs(deltaX));
if ( !lowestDeltaXY || absDeltaXY < lowestDeltaXY ) { lowestDeltaXY = absDeltaXY; }
fn = delta > 0 ? 'floor' : 'ceil';
delta = Math[fn](delta / lowestDelta);
deltaX = Math[fn](deltaX / lowestDeltaXY);
deltaY = Math[fn](deltaY / lowestDeltaXY);
args.unshift(event, delta, deltaX, deltaY);
return ($.event.dispatch || $.event.handle).apply(this, args);
}
}));

/*
* jScrollPane - v2.0.0beta5 - 2010-09-18
* http://jscrollpane.kelvinluck.com/
* Copyright (c) 2010 Kelvin Luck
* Dual licensed under the MIT and GPL licenses.
*/
(function(b,a,c){b.fn.jScrollPane=function(f){function d(C,L){var au,N=this,V,ah,v,aj,Q,W,y,q,av,aB,ap,i,H,h,j,X,R,al,U,t,A,am,ac,ak,F,l,ao,at,x,aq,aE,g,aA,ag=true,M=true,aD=false,k=false,Z=b.fn.mwheelIntent?"mwheelIntent.jsp":"mousewheel.jsp";aE=C.css("paddingTop")+" "+C.css("paddingRight")+" "+C.css("paddingBottom")+" "+C.css("paddingLeft");g=(parseInt(C.css("paddingLeft"))||0)+(parseInt(C.css("paddingRight"))||0);an(L);function an(aH){var aL,aK,aJ,aG,aF,aI;au=aH;if(V==c){C.css({overflow:"hidden",padding:0});ah=C.innerWidth()+g;v=C.innerHeight();C.width(ah);V=b('<div class="jspPane" />').wrap(b('<div class="jspContainer" />').css({width:ah+"px",height:v+"px"}));C.wrapInner(V.parent());aj=C.find(">.jspContainer");V=aj.find(">.jspPane");V.css("padding",aE)}else{C.css("width",null);aI=C.outerWidth()+g!=ah||C.outerHeight()!=v;if(aI){ah=C.innerWidth()+g;v=C.innerHeight();aj.css({width:ah+"px",height:v+"px"})}aA=V.innerWidth();if(!aI&&V.outerWidth()==Q&&V.outerHeight()==W){if(aB||av){V.css("width",aA+"px");C.css("width",(aA+g)+"px")}return}V.css("width",null);C.css("width",(ah)+"px");aj.find(">.jspVerticalBar,>.jspHorizontalBar").remove().end()}aL=V.clone().css("position","absolute");aK=b('<div style="width:1px; position: relative;" />').append(aL);b("body").append(aK);Q=Math.max(V.outerWidth(),aL.outerWidth());aK.remove();W=V.outerHeight();y=Q/ah;q=W/v;av=q>1;aB=y>1;if(!(aB||av)){C.removeClass("jspScrollable");V.css({top:0,width:aj.width()-g});n();D();O();w();af()}else{C.addClass("jspScrollable");aJ=au.maintainPosition&&(H||X);if(aJ){aG=ay();aF=aw()}aC();z();E();if(aJ){K(aG);J(aF)}I();ad();if(au.enableKeyboardNavigation){P()}if(au.clickOnTrack){p()}B();if(au.hijackInternalLinks){m()}}if(au.autoReinitialise&&!aq){aq=setInterval(function(){an(au)},au.autoReinitialiseDelay)}else{if(!au.autoReinitialise&&aq){clearInterval(aq)}}C.trigger("jsp-initialised",[aB||av])}function aC(){if(av){aj.append(b('<div class="jspVerticalBar" />').append(b('<div class="jspCap jspCapTop" />'),b('<div class="jspTrack" />').append(b('<div class="jspDrag" />').append(b('<div class="jspDragTop" />'),b('<div class="jspDragBottom" />'))),b('<div class="jspCap jspCapBottom" />')));R=aj.find(">.jspVerticalBar");al=R.find(">.jspTrack");ap=al.find(">.jspDrag");if(au.showArrows){am=b('<a class="jspArrow jspArrowUp" />').bind("mousedown.jsp",az(0,-1)).bind("click.jsp",ax);ac=b('<a class="jspArrow jspArrowDown" />').bind("mousedown.jsp",az(0,1)).bind("click.jsp",ax);if(au.arrowScrollOnHover){am.bind("mouseover.jsp",az(0,-1,am));ac.bind("mouseover.jsp",az(0,1,ac))}ai(al,au.verticalArrowPositions,am,ac)}t=v;aj.find(">.jspVerticalBar>.jspCap:visible,>.jspVerticalBar>.jspArrow").each(function(){t-=b(this).outerHeight()});ap.hover(function(){ap.addClass("jspHover")},function(){ap.removeClass("jspHover")}).bind("mousedown.jsp",function(aF){b("html").bind("dragstart.jsp selectstart.jsp",function(){return false});ap.addClass("jspActive");var s=aF.pageY-ap.position().top;b("html").bind("mousemove.jsp",function(aG){S(aG.pageY-s,false)}).bind("mouseup.jsp mouseleave.jsp",ar);return false});o()}}function o(){al.height(t+"px");H=0;U=au.verticalGutter+al.outerWidth();V.width(ah-U-g);if(R.position().left==0){V.css("margin-left",U+"px")}}function z(){if(aB){aj.append(b('<div class="jspHorizontalBar" />').append(b('<div class="jspCap jspCapLeft" />'),b('<div class="jspTrack" />').append(b('<div class="jspDrag" />').append(b('<div class="jspDragLeft" />'),b('<div class="jspDragRight" />'))),b('<div class="jspCap jspCapRight" />')));ak=aj.find(">.jspHorizontalBar");F=ak.find(">.jspTrack");h=F.find(">.jspDrag");if(au.showArrows){at=b('<a class="jspArrow jspArrowLeft" />').bind("mousedown.jsp",az(-1,0)).bind("click.jsp",ax);x=b('<a class="jspArrow jspArrowRight" />').bind("mousedown.jsp",az(1,0)).bind("click.jsp",ax);
if(au.arrowScrollOnHover){at.bind("mouseover.jsp",az(-1,0,at));x.bind("mouseover.jsp",az(1,0,x))}ai(F,au.horizontalArrowPositions,at,x)}h.hover(function(){h.addClass("jspHover")},function(){h.removeClass("jspHover")}).bind("mousedown.jsp",function(aF){b("html").bind("dragstart.jsp selectstart.jsp",function(){return false});h.addClass("jspActive");var s=aF.pageX-h.position().left;b("html").bind("mousemove.jsp",function(aG){T(aG.pageX-s,false)}).bind("mouseup.jsp mouseleave.jsp",ar);return false});l=aj.innerWidth();ae()}else{}}function ae(){aj.find(">.jspHorizontalBar>.jspCap:visible,>.jspHorizontalBar>.jspArrow").each(function(){l-=b(this).outerWidth()});F.width(l+"px");X=0}function E(){if(aB&&av){var aF=F.outerHeight(),s=al.outerWidth();t-=aF;b(ak).find(">.jspCap:visible,>.jspArrow").each(function(){l+=b(this).outerWidth()});l-=s;v-=s;ah-=aF;F.parent().append(b('<div class="jspCorner" />').css("width",aF+"px"));o();ae()}if(aB){V.width((aj.outerWidth()-g)+"px")}W=V.outerHeight();q=W/v;if(aB){ao=1/y*l;if(ao>au.horizontalDragMaxWidth){ao=au.horizontalDragMaxWidth}else{if(ao<au.horizontalDragMinWidth){ao=au.horizontalDragMinWidth}}h.width(ao+"px");j=l-ao;ab(X)}if(av){A=1/q*t;if(A>au.verticalDragMaxHeight){A=au.verticalDragMaxHeight}else{if(A<au.verticalDragMinHeight){A=au.verticalDragMinHeight}}ap.height(A+"px");i=t-A;aa(H)}}function ai(aG,aI,aF,s){var aK="before",aH="after",aJ;if(aI=="os"){aI=/Mac/.test(navigator.platform)?"after":"split"}if(aI==aK){aH=aI}else{if(aI==aH){aK=aI;aJ=aF;aF=s;s=aJ}}aG[aK](aF)[aH](s)}function az(aF,s,aG){return function(){G(aF,s,this,aG);this.blur();return false}}function G(aH,aF,aK,aJ){aK=b(aK).addClass("jspActive");var aI,s=function(){if(aH!=0){T(X+aH*au.arrowButtonSpeed,false)}if(aF!=0){S(H+aF*au.arrowButtonSpeed,false)}},aG=setInterval(s,au.arrowRepeatFreq);s();aI=aJ==c?"mouseup.jsp":"mouseout.jsp";aJ=aJ||b("html");aJ.bind(aI,function(){aK.removeClass("jspActive");clearInterval(aG);aJ.unbind(aI)})}function p(){w();if(av){al.bind("mousedown.jsp",function(aH){if(aH.originalTarget==c||aH.originalTarget==aH.currentTarget){var aG=b(this),s=setInterval(function(){var aI=aG.offset(),aJ=aH.pageY-aI.top;if(H+A<aJ){S(H+au.trackClickSpeed)}else{if(aJ<H){S(H-au.trackClickSpeed)}else{aF()}}},au.trackClickRepeatFreq),aF=function(){s&&clearInterval(s);s=null;b(document).unbind("mouseup.jsp",aF)};b(document).bind("mouseup.jsp",aF);return false}})}if(aB){F.bind("mousedown.jsp",function(aH){if(aH.originalTarget==c||aH.originalTarget==aH.currentTarget){var aG=b(this),s=setInterval(function(){var aI=aG.offset(),aJ=aH.pageX-aI.left;if(X+ao<aJ){T(X+au.trackClickSpeed)}else{if(aJ<X){T(X-au.trackClickSpeed)}else{aF()}}},au.trackClickRepeatFreq),aF=function(){s&&clearInterval(s);s=null;b(document).unbind("mouseup.jsp",aF)};b(document).bind("mouseup.jsp",aF);return false}})}}function w(){F&&F.unbind("mousedown.jsp");al&&al.unbind("mousedown.jsp")}function ar(){b("html").unbind("dragstart.jsp selectstart.jsp mousemove.jsp mouseup.jsp mouseleave.jsp");ap&&ap.removeClass("jspActive");h&&h.removeClass("jspActive")}function S(s,aF){if(!av){return}if(s<0){s=0}else{if(s>i){s=i}}if(aF==c){aF=au.animateScroll}if(aF){N.animate(ap,"top",s,aa)}else{ap.css("top",s);aa(s)}}function aa(aF){if(aF==c){aF=ap.position().top}aj.scrollTop(0);H=aF;var aI=H==0,aG=H==i,aH=aF/i,s=-aH*(W-v);if(ag!=aI||aD!=aG){ag=aI;aD=aG;C.trigger("jsp-arrow-change",[ag,aD,M,k])}u(aI,aG);V.css("top",s);C.trigger("jsp-scroll-y",[-s,aI,aG])}function T(aF,s){if(!aB){return}if(aF<0){aF=0}else{if(aF>j){aF=j}}if(s==c){s=au.animateScroll}if(s){N.animate(h,"left",aF,ab)}else{h.css("left",aF);ab(aF)}}function ab(aF){if(aF==c){aF=h.position().left}aj.scrollTop(0);X=aF;var aI=X==0,aH=X==j,aG=aF/j,s=-aG*(Q-ah);if(M!=aI||k!=aH){M=aI;k=aH;C.trigger("jsp-arrow-change",[ag,aD,M,k])}r(aI,aH);V.css("left",s);C.trigger("jsp-scroll-x",[-s,aI,aH])}function u(aF,s){if(au.showArrows){am[aF?"addClass":"removeClass"]("jspDisabled");ac[s?"addClass":"removeClass"]("jspDisabled")}}function r(aF,s){if(au.showArrows){at[aF?"addClass":"removeClass"]("jspDisabled");
x[s?"addClass":"removeClass"]("jspDisabled")}}function J(s,aF){var aG=s/(W-v);S(aG*i,aF)}function K(aF,s){var aG=aF/(Q-ah);T(aG*j,s)}function Y(aN,aL,aF){var aJ,aH,s=0,aG,aK,aM;try{aJ=b(aN)}catch(aI){return}aH=aJ.outerHeight();aj.scrollTop(0);while(!aJ.is(".jspPane")){s+=aJ.position().top;aJ=aJ.offsetParent();if(/^body|html$/i.test(aJ[0].nodeName)){return}}aG=aw();aK=aG+v;if(s<aG||aL){aM=s-au.verticalGutter}else{if(s+aH>aK){aM=s-v+aH+au.verticalGutter}}if(aM){J(aM,aF)}}function ay(){return -V.position().left}function aw(){return -V.position().top}function ad(){aj.unbind(Z).bind(Z,function(aI,aJ,aH,aF){var aG=X,s=H;T(X+aH*au.mouseWheelSpeed,false);S(H-aF*au.mouseWheelSpeed,false);return aG==X&&s==H})}function n(){aj.unbind(Z)}function ax(){return false}function I(){V.unbind("focusin.jsp").bind("focusin.jsp",function(s){if(s.target===V[0]){return}Y(s.target,false)})}function D(){V.unbind("focusin.jsp")}function P(){var aF,s;C.attr("tabindex",0).unbind("keydown.jsp").bind("keydown.jsp",function(aJ){if(aJ.target!==C[0]){return}var aH=X,aG=H,aI=aF?2:16;switch(aJ.keyCode){case 40:S(H+aI,false);break;case 38:S(H-aI,false);break;case 34:case 32:J(aw()+Math.max(32,v)-16);break;case 33:J(aw()-v+16);break;case 35:J(W-v);break;case 36:J(0);break;case 39:T(X+aI,false);break;case 37:T(X-aI,false);break}if(!(aH==X&&aG==H)){aF=true;clearTimeout(s);s=setTimeout(function(){aF=false},260);return false}});if(au.hideFocus){C.css("outline","none");if("hideFocus" in aj[0]){C.attr("hideFocus",true)}}else{C.css("outline","");if("hideFocus" in aj[0]){C.attr("hideFocus",false)}}}function O(){C.attr("tabindex","-1").removeAttr("tabindex").unbind("keydown.jsp")}function B(){if(location.hash&&location.hash.length>1){var aG,aF;try{aG=b(location.hash)}catch(s){return}if(aG.length&&V.find(aG)){if(aj.scrollTop()==0){aF=setInterval(function(){if(aj.scrollTop()>0){Y(location.hash,true);b(document).scrollTop(aj.position().top);clearInterval(aF)}},50)}else{Y(location.hash,true);b(document).scrollTop(aj.position().top)}}}}function af(){b("a.jspHijack").unbind("click.jsp-hijack").removeClass("jspHijack")}function m(){af();b("a[href^=#]").addClass("jspHijack").bind("click.jsp-hijack",function(){var s=this.href.split("#"),aF;if(s.length>1){aF=s[1];if(aF.length>0&&V.find("#"+aF).length>0){Y("#"+aF,true);return false}}})}b.extend(N,{reinitialise:function(aF){aF=b.extend({},aF,au);an(aF)},scrollToElement:function(aG,aF,s){Y(aG,aF,s)},scrollTo:function(aG,s,aF){K(aG,aF);J(s,aF)},scrollToX:function(aF,s){K(aF,s)},scrollToY:function(s,aF){J(s,aF)},scrollBy:function(aF,s,aG){N.scrollByX(aF,aG);N.scrollByY(s,aG)},scrollByX:function(s,aG){var aF=ay()+s,aH=aF/(Q-ah);T(aH*j,aG)},scrollByY:function(s,aG){var aF=aw()+s,aH=aF/(W-v);S(aH*i,aG)},animate:function(aF,aI,s,aH){var aG={};aG[aI]=s;aF.animate(aG,{duration:au.animateDuration,ease:au.animateEase,queue:false,step:aH})},getContentPositionX:function(){return ay()},getContentPositionY:function(){return aw()},getIsScrollableH:function(){return aB},getIsScrollableV:function(){return av},getContentPane:function(){return V},scrollToBottom:function(s){S(i,s)},hijackInternalLinks:function(){m()}})}f=b.extend({},b.fn.jScrollPane.defaults,f);var e;this.each(function(){var g=b(this),h=g.data("jsp");if(h){h.reinitialise(f)}else{h=new d(g,f);g.data("jsp",h)}e=e?e.add(g):g});return e};b.fn.jScrollPane.defaults={showArrows:false,maintainPosition:true,clickOnTrack:true,autoReinitialise:false,autoReinitialiseDelay:500,verticalDragMinHeight:0,verticalDragMaxHeight:99999,horizontalDragMinWidth:0,horizontalDragMaxWidth:99999,animateScroll:false,animateDuration:300,animateEase:"linear",hijackInternalLinks:false,verticalGutter:4,horizontalGutter:4,mouseWheelSpeed:10,arrowButtonSpeed:10,arrowRepeatFreq:100,arrowScrollOnHover:false,trackClickSpeed:30,trackClickRepeatFreq:100,verticalArrowPositions:"split",horizontalArrowPositions:"split",enableKeyboardNavigation:true,hideFocus:false}})(jQuery,this);
//]]>
</script>

<script>
$(document).ready(function() {
$('.scroll-pane').jScrollPane({showArrows: true});
});
</script>

2. Then locate this tag:
<body>
Or this line:
<body expr:class='&quot;loading&quot; + data:blog.mobileClass'>
Under any of these two add this:
<div class='scroll-pane' id='blog-container'>
3. Finally search for the </body> and above it paste this:
</div>
Save the changes and that's all. In green you will see where you can change the scrollbar colors and its different areas, or add other styles, such as shadows, rounded corners, etc..
If you want the top and bottom limits to not appear (as in the example) then remove what is in red.

Remember that the script uses jQuery, so if you already have it, then don't put the script again (the first line of code). If you are using Scriptaculous or Mootools, then you should make some slight changes in order to make it work.

Maybe the code might appear long but better add the scripts directly in the template, so the scripts will always be available and load faster. Regardless of all of this the end result is quite aesthetic, don't you think?
More aboutCustomize the scroll bar (scrollbar) with JScrollPane

Customizing Numbered Lists in Posts + 3 Examples

Posted by Unknown

From the Compose tab of a Blogger post, we can create numbered lists using the "Numbered List" tool.

blogger gadgets, blogger widgets

A numbered list is achieved through the HTML code of a "ordered list". You don't have to worry about adding the HTML, because the editor does it for you by using this tool. If you go to the HTML tab, you'll see that the list you created appears something like this:
   <ol>
<li>The content of the 1st. element</li>
<li>The content of the 2nd. element</li>
<li>The content of the 3rd. element</li>
<li>The content of the 4th. element</li>
    etc...
  </ol>
This tool will automatically number each element of the list taking an "order", hence the name "ordered lists in HTML". In each element a number is successively generated (from 1 onwards), though you can not see this in the HTML code.

Using ordered lists in posts


Creating numbered lists is very suitable for giving any instructions. It is ideal for cooking blogs where the steps in a recipe has to be numbered, or in those blogs that share tutorials... but can be used in any type of blog that need to number something.

By default, when using this tool, the numbered elements will look like:

  1. Nulla tincidunt, neque nec laoreet iaculis, tellus libero sagittis nisl, sed commodo lacus nulla ac sapien. Pellentesque vel magna vitae diam hendrerit bibendum tempus at magna. 
  2. Nulla pellentesque egestas sagittis. Cras blandit bibendum ante nec placerat. Nulla volutpat diam non quam suscipit et ornare nisi porttitor. Quisque eget elit nulla, et imperdiet nisi. 
  3. Vivamus sit amet nibh vel enim aliquam auctor. Phasellus fringilla eros leo, nec varius lacus. Vestibulum id dolor a nisl venenatis varius in nec enim. Pellentesque feugiat arcu ac purus rhoncus dapibus. 
  4. Etiam rutrum quam ac est bibendum cursus. In porttitor nunc odio, vel porttitor nisi. Pellentesque velit est, sodales luctus feugiat et, porta quis lacus. Vivamus non mauris urna, non commodo dui. 

However, we can customize the elements on the list with CSS. To achieve this, we will rely on this interesting tutorial from 456 Berea ST, that explains a technique in which using some key properties of CSS, we could customize both the numbers of each element in the list, also the content of each element.

The trick basically involves canceling the default numbering with "list-style: none", and then use automatic numbering properties: "counter-reset" and "counter-increment". Then the property "content" is added to the index of the counter that is created using the previous two properties.

Examples

Here are three examples that I have prepared for those of you who want to customize numbered lists and if you will like one of them, simply copy and paste the CSS code by going to Template > Customize > Advanced > Add CSS. Of course, later, you can customize the background colors, borders, etc..

Style 1.

  1. Nulla tincidunt, neque nec laoreet iaculis, tellus libero sagittis nisl, sed commodo lacus nulla ac sapien. Pellentesque vel magna vitae diam hendrerit bibendum tempus at magna. 
  2. Nulla pellentesque egestas sagittis. Cras blandit bibendum ante nec placerat. Nulla volutpat diam non quam suscipit et ornare nisi porttitor. Quisque eget elit nulla, et imperdiet nisi. 
  3. Vivamus sit amet nibh vel enim aliquam auctor. Phasellus fringilla eros leo, nec varius lacus. Vestibulum id dolor a nisl venenatis varius in nec enim. Pellentesque feugiat arcu ac purus rhoncus dapibus. 
  4. Etiam rutrum quam ac est bibendum cursus. In porttitor nunc odio, vel porttitor nisi. Pellentesque velit est, sodales luctus feugiat et, porta quis lacus. Vivamus non mauris urna, non commodo dui. 
.post-outer ol{
 counter-reset:li;
 margin-left:0;
 padding-left:0
}
.post ol li{
 position:relative;    
 margin:0 0 20px 2em !important;
 padding:4px 8px !important;
 list-style:none;
 *list-style: decimal;
}
.post ol li:before{
 content:counter(li);
 counter-increment:li;
 position:absolute;
 top:-8px;
 left:-39px;
 font-family:'Oswald', serif;
 font-size:40px; /* font size*/
 width:34px;
 margin:0 0 10px 0;
 padding:4px !important;
 color:#727272; /* font color */
 text-align:center;
}
Style 2.

  1. Nulla tincidunt, neque nec laoreet iaculis, tellus libero sagittis nisl, sed commodo lacus nulla ac sapien. Pellentesque vel magna vitae diam hendrerit bibendum tempus at magna. 
  2. Nulla pellentesque egestas sagittis. Cras blandit bibendum ante nec placerat. Nulla volutpat diam non quam suscipit et ornare nisi porttitor. Quisque eget elit nulla, et imperdiet nisi. 
  3. Vivamus sit amet nibh vel enim aliquam auctor. Phasellus fringilla eros leo, nec varius lacus. Vestibulum id dolor a nisl venenatis varius in nec enim. Pellentesque feugiat arcu ac purus rhoncus dapibus. 
  4. Etiam rutrum quam ac est bibendum cursus. In porttitor nunc odio, vel porttitor nisi. Pellentesque velit est, sodales luctus feugiat et, porta quis lacus. Vivamus non mauris urna, non commodo dui. 
.post-outer ol{
counter-reset:li;
margin-left:0;
padding-left:0
}
.post ol li{ /* the style of each element */
position:relative;
margin:0 0 20px 2em !important;
padding:4px 8px !important;
list-style:none;
*list-style: decimal;
border:1px solid #e2e3e2; /* border color */
background:#f2f2f2; /* background color */
text-indent:10px;
}
.post ol li:before{ /* the numbers' style */
content:counter(li);
counter-increment:li;
position:absolute;
top:-5px;
left:-5px;
font-family:'Oswald', serif;
font-size:14px;
width:12px;
margin:0 0 10px 0;
padding:4px !important;
color:#727272; /* text color */
text-align:left;
background:#e2e2e2; /* background color */
text-indent:2px
}
.post ol li:after{
content:"";
position:absolute;
top:-5px;
left:14px;
width: 0px;
height: 0px;
border-style: solid;
border-width: 5px 0 0 5px;
border-color: transparent transparent transparent #aeaeae; /* triangle color */
}
Style 3.

  1. Nulla tincidunt, neque nec laoreet iaculis, tellus libero sagittis nisl, sed commodo lacus nulla ac sapien. Pellentesque vel magna vitae diam hendrerit bibendum tempus at magna. 
  2. Nulla pellentesque egestas sagittis. Cras blandit bibendum ante nec placerat. Nulla volutpat diam non quam suscipit et ornare nisi porttitor. Quisque eget elit nulla, et imperdiet nisi. 
  3. Vivamus sit amet nibh vel enim aliquam auctor. Phasellus fringilla eros leo, nec varius lacus. Vestibulum id dolor a nisl venenatis varius in nec enim. Pellentesque feugiat arcu ac purus rhoncus dapibus. 
  4. Etiam rutrum quam ac est bibendum cursus. In porttitor nunc odio, vel porttitor nisi. Pellentesque velit est, sodales luctus feugiat et, porta quis lacus. Vivamus non mauris urna, non commodo dui. 
.post ol{
counter-reset:li;
margin-left:0;
padding-left:0
}
.post ol li{
position:relative;    
margin:0 0 13px 2em !important;
padding:4px 8px !important;
list-style:none;
*list-style:decimal;
}
.post ol li:before{
content:counter(li);
counter-increment:li;
position:absolute;
top:0;
left:-2em;
width:27px;
margin-right:8px;
padding:3px 1px 4px 0 !important;
color:#fff; /* text color */
font-size:16px;
background:url(https://blogger.googleusercontent.com/img/b/R29vZ2xl/AVvXsEixhV5q2GY36FJNsmJCoXIobU2ZuqikKT3HOLisVEbybOGA7f96N8Aka4itYRgfJbKymUDxZ4cqIc45gEA1Q3JNY-llqDpu63DUwNZkCwHaeGUeFHvseze056Z9YsTKsxO3OuMYeS3Hjas/s1600/blue.png) no-repeat left top;
font-weight:bold;
text-align:center
}
In this last example, I decided to use an image for the circle (highlighted in blue) as the background of the number. We can create the circle with CSS, but it will be squared in Internet Explorer 8.

Anyway, here I leave other images of circles with other colors that you can use if you want.


Note: With red are highlighted the values that can be edited in the CSS of these three examples, and added some comments highlighted in /* green */, so that you can know what each thing does.

Compatibility:

This will work in all browsers including IE8 - in the case of Internet Explorer 7, the number' styles will not be seen as it does not support the :before or :after pseudo-elements. However, I have added a line in the CSS that's specific for that browser and will bring up the default numbering of the ordered list.

Hopefully it will be useful for you ;)
More aboutCustomizing Numbered Lists in Posts + 3 Examples

4 Different Styles For the Popular Posts Widget

Posted by Unknown

Blogger allows us to easily add a "Popular Posts" widget, that we select from its list of gadgets, and we can do that by going to the "Layout" of our Blog.

This gadget, as the name implies, shows which are the most visited blog posts, and you can set it to display the info you want in four possible combinations: (1) only the title of the post, (2) a thumbnail of the image and the post title, (3) post title with a summary, and (4) post title with a thumbnail and a post snippet.

This is an element that you shouldn't miss in your blog because it encourages your visitors to navigate through your content, which can result in higher income if you're monetizing your blog because it would generate an increase in the number of pages visited, and in turn, can attract the users' interest to subscribe to the blog and to read interesting content.

Preliminary steps: Add the gadget, if you haven't done it yet.


1. Select the "Layout" tab and add the "Popular Posts" gadget in that part of your blog you want to appear, such as in your sidebar, by clicking on "Add a Gadget".

2. Configure the widget to show only the post titles. You can do this by clicking on the "image thumbnail" and "snippet" checkboxes, as shown in the following image.

3. After configuring the widget, save the changes by clicking on Save, and then Save arrangement.

How to add the CSS to create the style of the Popular Posts widget


1. Choose a style, then copy the CSS that appears below the image that shows the style.

2. Select the "Template" tab, then click on Customize > Advanced > Add CSS and then paste the CSS style that you like the most.

blogger tutorials
3. Once you add the CSS, Save changes by clicking on the "Apply to Blog" button.

And that's it! I've already customized the popular posts widget, when it only shows post titles.

Styles

Here is the CSS of each style, just choose the one you like the best and put it on your blog. You can see each of these styles in action in the following demo blog:

http://demo-blog343.blogspot.com

Style 1:
blogger gadgets, blogger widgets
#PopularPosts1 h2{
padding:7px 0 3px 0;
width:100%;
margin:0;
font-size:1.3em;
text-indent:-12px;
font-size:18px;
text-align:center;
color: #000; /* Color of the widget's title */
}
#PopularPosts1 ul{
list-style:none;
counter-reset:li;
padding:8px 0px 1px;
left:-8px;
width:290px;
}
#PopularPosts1 li{
position:relative;
margin:0 0 10px 0;
padding: 3px 2px 0 7px;
left:-5px;
width:285px;
border:1px solid #ccc;
}
#PopularPosts1 ul li:before{
content:counter(li);
counter-increment:li;
position:absolute;
display:block;
top:-5px;
left:-5px;
font-size:18px;
width:14px;
margin:0 0 10px 0;
padding:4px 4px 4px 3px;
color:#333;
text-align:left;
background:#E8E8E8;
text-indent:2px;
}
#PopularPosts1 ul li:after{
content:"";
position:absolute;
top:-5px;
left:15px;
width: 0px;
height: 0px;
border-top:5px outset transparent;
border-left:5px solid #aeaeae;
}

#PopularPosts1 ul li a{
font-size:17px; /* Font size of the links */
color:#444; /* Color of the links */
font-style: italic;
margin-left:17px;
display:block;
min-height:25px;
text-decoration:none;
padding:0 4px 3px 0;
}
#PopularPosts1 ul li:hover{
background:#f9f9f9;
border:1px solid #aaa;
}
#PopularPosts1 ul li a:hover{
color:#0174DF;
}

Style 2:
blogger gadgets, blogger widgets
#PopularPosts1 h2{
position:relative;
padding:8px 10px 6px 10px;
width:100%;
margin:0;
font-size:17px;
background: #bada55;
color:#222; /* Color of the widget's title */
text-align:center;
}
#PopularPosts1 h2:before{
position:absolute;
content:"";
top:-6px;
right:-5px;
width: 0px;
height: 0px;
border-bottom:24px outset transparent;
border-top:24px outset transparent;
border-right:24px solid #fff; /* Color of the triangle */
}

#PopularPosts1 h2:after{
position:absolute;
content:"";
top:-7px;
left:-5px;
width: 0px;
height: 0px;
border-bottom:24px outset transparent;
border-top:24px outset transparent;
border-left:24px solid #fff; /* Color of the triangle */
}

#PopularPosts1 ul{
list-style:none;
counter-reset:li;
padding:10px;
left:-8px;
width:100%;
}

#PopularPosts1 li{ /* Styles of each element */
width:100%;
position:relative;
left:0;
margin:0 0 1px 12px;
padding:4px 5px;
}

#PopularPosts1 ul li:before{ /* style of the numbers */
content:counter(li);
counter-increment:li;
position:absolute;
top:2px;
left:-23px;
font-size:35px; /* Font size of the numbers */
width:20px;
color:#666; /* Color of the text */
}
#PopularPosts1 ul li a{
display:block;
position:relative;
left:-30px;
width:100%;
margin:0;
padding: 9px 3px 10px 29px;
font-size:15px; /* Font size of the links */
font-style: italic;
color:#333; /* Color of the links */
text-decoration:none;
transition: all .1s ease-in-out;
}
#PopularPosts1 ul li a:hover{
color:#3366ff;
margin-left:3px;
}

Style 3:
blogger gadgets, blogger widgets
#PopularPosts1 h2{
position:relative;
right:-2px;
padding:8px 63px 6px 17px;
width:100%;
margin:0;
font-size:16px;
background:#C00000; /* Background color */
color:#f2f2f2; /* Color of the widget's title */
text-align:left;
text-indent:18px;
}
#PopularPosts1 h2:before{
position:absolute;
content:"";
top:33px;
right:0px;
width: 0px;
height: 0px;
border-bottom:12px outset transparent;
border-left:12px solid #800000;
}
#PopularPosts1 h2:after{
position:absolute;
content:"";
top:-6px;
left:-5px;
width: 0px;
height: 0px;
border-bottom:24px outset transparent;
border-top:24px outset transparent;
border-left:24px solid #fff;
}
#PopularPosts1 ul{
list-style:none;
counter-reset:li;
padding:10px;
left:-8px;
width:100%;
}
#PopularPosts1 li{
width:100%;
position:relative;
left:0;
margin:7px 0 16px 12px;
padding:10px  4px 0 5px;
}
#PopularPosts1 ul li:before{
content:counter(li);
counter-increment:li;
position:absolute;
top:-2px;
left:-20px;
font-size:33px;
width:20px;
color:#888888;
}

#PopularPosts1 ul li a{
display:block;
font-size:14px; /* Font size of the links */
color: #666; /* Color of the links */
text-decoration:none;
transition: all .1s ease-in-out;
}
#PopularPosts1 ul li a:hover{
color:#3366FF;
margin-left:3px;
}

Style 4:
blogger gadgets, blogger widgets
#PopularPosts1 h2{
padding:8px 10px 3px 0;
width:100%;
margin:0;
font-size:16px;
position:relative;
left:-20px;
display:block;
border-bottom:2px solid #ccc;
}
#PopularPosts1 ul{
list-style:none;
counter-reset:li;
padding:10px;
width:100%;
}
#PopularPosts1 li{ /* Styles of each element */
width:100%;
position:relative;
left:0;
margin:0 0 6px 10px;
padding:4px 5px;
}
#PopularPosts1 ul li:before{ /* Style of the numbers */
content:counter(li);
counter-increment:li;
position:absolute;
top:3px;
left:-39px;
font-size:21px;
width:28px;
height:28px;
border-radius: 50%;
color:#777; /* Text color */
border: 2px solid #ddd; /* Rounded border color */
padding:0;
text-indent:9px;
}
#PopularPosts1 ul li a{
display:block;
position:relative;
left:-45px;
width:100%;
margin:0;
min-height:28px;
padding: 5px 3px 3px 39px;
color:#333; /* color of the links */
text-decoration:none;
font-size:14px; /* Font size of the links */
font-style: italic;

}
#PopularPosts1 ul li a:hover{
color:#3366ff;
margin-left:3px;
}

Final Notes

All the CSS is valid. I just have to mention that the numbering is not visible in Internet Explorer 7, since that version of the browser does not support properties that make the numbers appear. For example in the 4th style, the circles look squared in IE8 and earlier versions since, these versions do not support a property that makes them look as circles.

Fonts will be inherited from the template, since they have not been declared in the CSS.
More about4 Different Styles For the Popular Posts Widget