Showing posts with label Hacks. Show all posts

Redirect Blogger 404 Error (Page Not Found) To Homepage

Posted by Unknown

Whenever, by mistake, we or a user misspells an URL inexistent in our blog, it automatically redirects to the 404 error page (page not found). A message like this would appear:

"Sorry, the page you were looking for in this blog does not exist."

how to redirect blogger 404 error to homepage
And probably this will not make a good impression on the greatest potential users of our blog. Before the user clicks the back button or close the window/browser's tab, thus leaving our site forever, we may want to redirect 404 error in Blogger to a page, where are chances that the visitor will continue reading our blog.

One of the most used methods is the "meta refresh" but the problem with this method is that it breaks navigation (doesn't allow returning back). In this case, the best method is by using Javascript which will be shown below.

Redirect Blogger 404 Error with Javascript


First of all, go to your Blogger dashboard and then to Settings > Search preferences > Custom Page Not Found.

redirect 404 error page in blogger to homepage

Copy and paste the following code:
Sorry, the page you're looking for in this blog does not exist.
You will be redirected to homepage shortly.
<script type = "text/javascript">
BSPNF_redirect = setTimeout(function() {
location.pathname= "/"
}, 5000);
</script>
The message which is going to be displayed can be edited as you want. If you are willing to redirect your blog 404 error page to another page other than your home page, just replace pathname to href and / with the url of your page. And finally, the number 5000 is the delay expressed in milliseconds. You can edit any value if this is more convenient.

Next thing to do is to save all changes made in this section and do a little test to check if the code works well. You can enter a nonexistent URL on your blog, and see if the 404 error page added previously appears, followed by a redirection after 5 seconds. That's it!
More aboutRedirect Blogger 404 Error (Page Not Found) To Homepage

How to make the background image of the blog fill the entire screen

Posted by Unknown

A constant question is how to make the background image of the blog always fill the entire screen regardless of the resolution of the monitor. And that is when we put a background image as measured by our monitor forgetting that there are actually monitors of all resolutions, very small and very large. So if we put an image according to our screen, there will be someone with a bigger monitor that surely will not see the whole picture or it will be repeated, and in this case, using very small monitors, the image will be seen incomplete.
blogger tricks, blogger tutorials, blogger blogspot

Here I will discuss two solutions to this, one using CSS3, and another with jQuery. With either of these two, we'll make the background image of the page to fill the entire screen regardless of the resolution of it.

CSS3


The first option is using CSS3, the advantage with this method is that we do not overload the blog with scripts, we use only the background-size property that is responsible for conducting what we want.
The disadvantage is that this property is supported only by modern browsers, so in the case of Internet Explorer, it will only be seen for version 9 and above, in other browsers there should be no problem.

The method is very simple, just go to Template - Edit HTML, locate the background that is within body { and replace it with this:
background: url(Image URL) no-repeat center center fixed;
background-size: cover;
It would look something like this:
body {
background: url(URL of the image) no-repeat center center fixed;
background-size: cover;
margin:0;
color:#000;
font:x-small Georgia Serif;
font-size/* */:/**/small;
font-size: /**/small;
text-align: center;
}
Just put the URL of the image and that's it.

jQuery


With this method we will use jQuery with BackStretch plugin, the advantage is that it works in all browsers, including IE7 and above. The disadvantage is not major if you already use jQuery, because the plugin is actually small.

To use this method in your blog, go to Template - Edit HTML and before </head> paste this script:
<script src='http://ajax.googleapis.com/ajax/libs/jquery/1.10.2/jquery.min.js' type='text/javascript'/>
<script type='text/javascript'>
//<![CDATA[
/*
* jQuery Backstretch
* Version 1.2.8
* http://srobbin.com/jquery-plugins/jquery-backstretch/
* Add a dynamically-resized background image to the page
* Copyright (c) 2012 Scott Robbin (srobbin.com)
* Licensed under the MIT license
* https://raw.github.com/srobbin/jquery-backstretch/master/LICENSE.txt
*/
;(function(a){a.backstretch=function(p,b,l){function s(){if(p){var b;0==c.length?c=a("<div />").attr("id","backstretch").css({left:0,top:0,position:m?"fixed":"absolute",overflow:"hidden",zIndex:-999999,margin:0,padding:0,height:"100%",width:"100%"}):c.find("img").addClass("deleteable");b=a("<img />").css({position:"absolute",display:"none",margin:0,padding:0,border:"none",zIndex:-999999,maxWidth:"none"}).bind("load",function(d){var b=a(this),e;b.css({width:"auto",height:"auto"});e=this.width||a(d.target).width();d=this.height||a(d.target).height();n=e/d;q();b.fadeIn(g.speed,function(){c.find(".deleteable").remove();"function"==typeof l&&l()})}).appendTo(c);0==a("body #backstretch").length&&(0===a(window).scrollTop()&&window.scrollTo(0,0),a("body").append(c));c.data("settings",g);b.attr("src",p);a(window).unbind("resize.backstretch").bind("resize.backstretch",function(){"onorientationchange"in window&&window.pageYOffset===0&&window.scrollTo(0,1);q()})}}function q(){try{j={left:0,top:0},rootWidth=h=o.width(),rootHeight=r?window.innerHeight:o.height(),f=h/n,f>=rootHeight?(k=(f-rootHeight)/2,g.centeredY&&(j.top="-"+k+"px")):(f=rootHeight,h=f*n,k=(h-rootWidth)/2,g.centeredX&&(j.left="-"+k+"px")),c.css({width:rootWidth,height:rootHeight}).find("img:not(.deleteable)").css({width:h,height:f}).css(j)}catch(a){}}var t={centeredX:!0,centeredY:!0,speed:0},c=a("#backstretch"),g=c.data("settings")||t;c.data("settings");var o,m,r,n,h,f,k,j;b&&"object"==typeof b&&a.extend(g,b);b&&"function"==typeof b&&(l=b);a(document).ready(function(){var b=window,d=navigator.userAgent,c=navigator.platform,e=d.match(/AppleWebKit\/([0-9]+)/),e=!!e&&e[1],f=d.match(/Fennec\/([0-9]+)/),f=!!f&&f[1],g=d.match(/Opera Mobi\/([0-9]+)/),h=!!g&&g[1],i=d.match(/MSIE ([0-9]+)/),i=!!i&&i[1];o=(m=!((-1<c.indexOf("iPhone")||-1<c.indexOf("iPad")||-1<c.indexOf("iPod"))&&e&&534>e||b.operamini&&"[object OperaMini]"==={}.toString.call(b.operamini)||g&&7458>h||-1<d.indexOf("Android")&&e&&533>e||f&&6>f||"palmGetResource"in window&&e&&534>e||-1<d.indexOf("MeeGo")&&-1<d.indexOf("NokiaBrowser/8.5.0")||i&&6>=i))?a(window):a(document);r=m&&window.innerHeight;s()});return this}})(jQuery);
//]]>
</script>
<script>
$.backstretch("URL of the image");
</script>

Put the URL of the image where indicated and ready.

As you can see both systems are easy to apply, each with its pros and cons, but the result is the same, extending the background image to fit the screen of any monitor regardless of the resolution of it.

Remember that in the case of jQuery method, you should verify that you are not using Mootools or Scriptaculous, if so you will have to implement some changes in the script to make it compatible.
And if you already use jQuery remember having only one version, the last one.
More aboutHow to make the background image of the blog fill the entire screen

Making a gadget visible only to the blog administrator

Posted by Unknown

And the post title says it all. There are gadgets that sometimes we want to be visible only to us and not to our blog readers, perhaps a Survey already ended that we want to keep, a counter, or any gadget that while we customize, we don't want anyone else to see until the final result is ready.
blogger widgets, blogger tutorials
 The procedure is simple, we just have to add two lines to our gadget that we want to hide.

First thing to do is to go to Template > Edit HTML and then search for the gadget's code we want to hide. It will be easier using the CTRL + F keys and locating the name of the gadget/widget.

For example, in a HTML/Javascript gadget, we will see a code like this:
<b:widget id='HTML1' locked='false' title='' type='HTML'>
<b:includable id='main'>
<span class='item-control blog-admin'>
<!-- only display title if it's non-empty -->
<b:if cond='data:title != &quot;&quot;'>
<h2 class='title'><data:title/></h2>
</b:if>
<div class='widget-content'>
<data:content/>
</div>

<b:include name='quickedit'/>
</span>
</b:includable>
</b:widget>
All you have to do is add the parts in red and ready. If you close the session go to your blog you'll not be able to view the gadget that you have hidden, but as soon as you sign in you will see that it is visible to you.

Not all gadgets have the same structure like in my example, but it will be easier to guide you, just place the first code in red just after <b:includable id='main'>

And the second red code just before </b:includable>
Note: to look inside the widget's code, click on the sideways arrow next to the widget's id.

And with that the gadget will be hidden for readers except you.
More aboutMaking a gadget visible only to the blog administrator

Add a Different Background For Author Comments in Blogger's Threaded Comments

Posted by Unknown

In this tutorial we will learn how to highlight the author comments so that they will have a different background color, border, or anything that makes them stand out from the others. To achieve this, we need to add a code in the Blogger's template and to modify the style according to our preferences.
blogger tricks, blogger comments
  

How to highlight author comments in Blogger:

Step 1. Go to Template, click on Edit HTML

blogger threaded comments, customize blogger comments

Step 2. Click anywhere inside the code area and try to find - using CTRL + F keys - this tag:
</body>
Screenshot:
blogger comments, blogger tricks

Step 3. Just above it, paste the following code:
<script src='http://code.jquery.com/jquery-latest.js'/>
<script>
$(function() {
function highlight(){
$('.user.blog-author').closest('.comment-block')
.css('border', '1px solid #FFA500')
.css('background','#F1F1F2 url("http://www.blogblog.com/1kt/transparent/white80.png")')
.css('color', '#444444')
.css('font-size', '12px')
.css('padding', '10px');
}
$(document).bind('ready scroll click', highlight);
});
</script>

Customizing the Author Comments:


Border:
The line marked in orange represents the border's style.
What it can be done:
  • 1px - you can increase the value to change the border's thickness
  • solid - change the border's style to dotted, dashed, inset, outset etc.
  • #FFA500 - this is the border's color value, change it with your own color

Background:
The line marked in blue represents the background's style. You can use a plain color or an image. By default there's a combination of both (a white transparent image with a gray plain color).
To change/add:
  • a different color: replace the #F1F1F2 value with your own (use this tool to find the hex code of your desired color)
  • an image: replace the defaul url http://www.blogblog.com/1kt/transparent/white80.png with that of your image

Font Color:
To change the font's color, replace the #444444 color value in green with your own. (you can use this tool to find the hex code of your desired color)

Font Size:
Modify the value in red by increasing/decreasing the "12" value in order to change the size of text.

Step 4. Now Save your Template.

To customize the entire style of threaded comments, please check my previous tutorial on How to Customize Comment's Background, Font Color and Border in Blogger.
More aboutAdd a Different Background For Author Comments in Blogger's Threaded Comments

How to Customize Blogger Comments By Adding a Background Color and Border

Posted by Unknown

The comments are an essential part of a blog because in them is reflected the readers' opinions regarding a post or our blog, so it is important to spend a little of our time to make this part looking more presentable, accessible and neat.

To set in order our comments, it is necessary to make each comment easy to identify, therefore to know from where it begins and to where it ends, otherwise it becomes a jumble of letters of which the reader can run away. Here are some ways to make some order by separating each comment.

- Add a Separator To Blogger Comments
- Add a Divider Below Comments in Blogger
- Fully Customize Your Blogger Comments By Changing The Background Color and Border

The first method is the easiest, and is about how to put a border below our comments, this is to separate each blog comment in a simple but effective way.

How to Add a Separator/Border To Blogger Comments

customize comments, blogger

Step 1. To add a simple separator go to Template > Edit HTML and click on the small arrow on the left of <b:skin>...</b:skin>
Step 2. Click anywhere inside the code area and search using CTRL + F keys, for the following piece of code:
]]></b:skin>

Step 3. Paste the following style just above it:

- If we are using threaded comments (with the reply option):

.comment-block {
border-bottom: 1px solid #000000;
}

.comments .continue {
  border-top: 0px solid $(widget.alternate.text.color);
}

- If we are using previous commenting system (with no reply option)

#comments-block .comment-footer {
border-bottom:1px solid #000000;
}

Note: To change the border's color, replace the bolded color value and to change its thickness, increase/decrease the 1 value.

Step 4. Save the Template.

Instead of a simple border, we can also add a divider/image between our comments.

How to Add a Divider (Image) Between Each Comment in Blogger

blogger comments, blogger tricks, blogger tutorials

Step 1. Go to Template > 
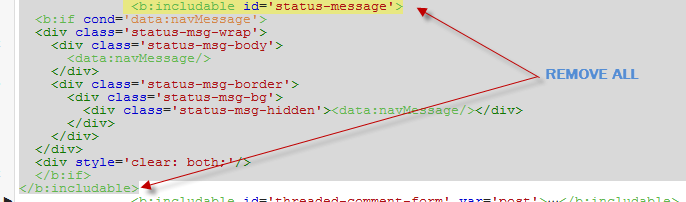
Edit HTML and search (CTRL + F) for the following piece of code:
]]></b:skin>
Screenshot:


Step 2. Paste the following just above it:

- If we are using threaded comments (with the reply option):
.comment-block {
background-image:url(https://blogger.googleusercontent.com/img/b/R29vZ2xl/AVvXsEgl82MD9SMJGmv_w6nwnGgdsdWkQmLQPoIztfqh7prxZnjL6zdr8qJpWuVE1pYdgxL5-kDvk_t9RaCMCHSKBBuKTZD6ufBiLNcKrwLGeJgb4gGn0vmknGKa_Pth9D169Wm5K5Zxlmf0180_/s1600/74.gif);
background-repeat:no-repeat;
background-position:center bottom;
padding-bottom:30px;
margin-top: -10px;
}

.comments .continue {
border-top: 0px solid $(widget.alternate.text.color);
}

- If we are using previous commenting system (with no reply function)
#comments-block .comment-footer {
background-image:url(https://blogger.googleusercontent.com/img/b/R29vZ2xl/AVvXsEgl82MD9SMJGmv_w6nwnGgdsdWkQmLQPoIztfqh7prxZnjL6zdr8qJpWuVE1pYdgxL5-kDvk_t9RaCMCHSKBBuKTZD6ufBiLNcKrwLGeJgb4gGn0vmknGKa_Pth9D169Wm5K5Zxlmf0180_/s1600/74.gif);
background-repeat:no-repeat;
background-position:center bottom;
height: 50px;
}

Note: The URL that is in blue represents the image that you can change as you like, just remember that at the height must set the height of an image with 30px more, for instance, if the image's height is 50px then the value will be 80px. This is for making sure that the image won't overlap the date of comments. (for threaded comments, increase/decrease the padding 30 value)

Step 3. Save the Template.

But you can still have more styles for each comment, for example adding a background color and a border.

How to Add A Border and A Background Color To Blogger Comments

blogger tips, blogger tricks, gadgets
Step 1. Go to Template > Edit HTML and search for the following piece of code:
]]></b:skin>

Step 2. Paste the following just above it:

- If we are using threaded comments (with the reply option):
.comment-block {
background:#F9F9F9; /* Background Color */
border: 1px solid #f1f1f1; /* Border style */
margin-bottom:20px;
-webkit-box-shadow: 0 1px 2px rgba(0, 0, 0, .4);
-moz-box-shadow: 0 1px 2px rgba(0, 0, 0, .4);
box-shadow: 0 1px 2px rgba(0, 0, 0, .4);
-moz-border-radius: 10px;
-webkit-border-radius: 10px;
border-radius: 10px;
}

.comments .comment-thread.inline-thread {
background-color: #FAFAFA; /* Background color behind the replies */
border-left: 4px dotted #E6E6E6; /* Border on the left side of replies */
}

.comment-content {
padding:2px 10px 10px 10px;
color:#444444; /* Font Color in Comments */
}

.datetime a {
font-style:italic;
font-size:9px;
margin-left: 2px;
}

.comments .comments-content .user a{
color:#1982D1; /* Author's name color */
font-size: 12px; /* Author's name size */
padding-left: 10px;
font-weight:bold;
text-decoration:none;
}

.comments .comment .comment-actions a,.comments .comment .continue a{
display:inline-block;
margin:0 0 10px 10px;
padding:0 15px;
color:#B4B4B7;
text-align:center;
text-decoration:none;
background:#F8F8FB;
border:1px solid #C2C2C5;
border-radius:4px;
height:20px;
line-height:20px;
font-weight:normal;
cursor:pointer;
}

.comments .continue {
border-top: 0px solid $(widget.alternate.text.color);
}

.comments .comments-content .icon.blog-author {
background-image: none;
margin-left: -10px;
}

.comments .avatar-image-container{
margin: 0px 0px 0px 0px;
padding: 0px 0px 0px 0px;
width: 40px;
max-height: 40px;
border: 1px solid #F2F2F2;
padding: 1px;
}

.comments .avatar-image-container img{
margin: 0px 0px 0px 0px;
padding: 0px 0px 0px 0px;
max-width: 40px;
height: 40px;
}

Step 3. Save the Template.

- If we are using previous commenting system (with no reply function):

Step 1. Search for this line in your template:
<b:loop values='data:post.comments' var='comment'>

Step 2. Then, add the following code just below of it:
<div class='comments-ct'>

Step 3. Look a little further down and you'll see the </b:loop> code and just above it, add this:
</div>

Step 4. Now find this:
]]></b:skin>

Step 5. And just above of it, add this CSS code:
.comments-ct{
background:#F9F9F9; /* Background Color */
border: 1px solid #f1f1f1; /* Bprder Style */
margin-bottom:20px;
-webkit-box-shadow: 0 1px 2px rgba(0, 0, 0, .4);
-moz-box-shadow: 0 1px 2px rgba(0, 0, 0, .4);
box-shadow: 0 1px 2px rgba(0, 0, 0, .4);
-moz-border-radius: 10px;
-webkit-border-radius: 10px;
border-radius: 10px;
}

.comment-body {
color:#444444; /* Font Color in Comments */
padding:10px;
}

.comments-ct a {
padding-left: 5px; /* Link color */
color: #4A9BD8;
}

.comment-timestamp a {
font-style:italic;
font-size:9px;
padding-right:10px;
padding-left:10px;
}
(The rounded edges will not work in Internet Explorer with CSS)

In either case, you can change the background color, border, etc.. in parts with annotations in green.

Step 6. Save the Template.

If you need more help, leave a comment below.
More aboutHow to Customize Blogger Comments By Adding a Background Color and Border

How to Add a Vintage Style to Images In Blogger using CSS

Posted by Unknown

To get that vintage Instagram effect for your pictures you don't have to use a program, now you can use CSS and get a similar result! We will apply a shadow inside the image, add a border, we will put a color in it, and on top of our image, we will add another semitransparent image with a grunge style that will give a vintage touch.

You can see the example in this picture below, moving the cursor changes to normal but keeps the edge.

vintage images blogger

Obviously there will be images that will fit better these effects than others, but regardless of that we do, there should be made a few observations:
  1. It is made with CSS styles so as some of you might already know, it will not recognize browsers, specifically Internet Explorer, so using IE browser does not show any effect.
  2. Hovering around the image will change with a transition effect, but only in Firefox.
  3. The images are not centered, you will have to align to left (default), or right.
Having clarified the above, let's start adding the CSS code to our template.

Adding a Vintage Effect to Blogger Images

Step 1. Go to Template > Edit HTML


Step 2. Select the "Expand widget templates" box

 Step 3. Search for the following piece of code:

]]></b:skin>

Step 4. Just above it, add the following CSS code:

/* Vintage Images
----------------------------------------------- */
.vintage img {
padding:0;
float:left;
}
.vintage {
border:10px solid #000;
position: relative;
float: left; /* Change to right if you want the images to be aligned to the right */
margin-right: 20px;
margin-bottom: 20px;
}
.vintage:before {
content: "";
display: block;
position: absolute;
top: 0;
bottom: 0;
left: 0;
right: 0;
background-color: rgba(255,102,0, 0.6); /* sepia */
background-image:url(https://blogger.googleusercontent.com/img/b/R29vZ2xl/AVvXsEh9vngvC3qtAqXo3O9jabGImwJh7ydLbcJhrqXmecC2ZxeuEjJkO6xW2bbohEEoJEDqFM3t4Vu6uchoSg83Mmb49u_wgtUg9xMhOKqHMmRKRzywRmM5wbH9X0-YPy_rFw1wc9CNZKylzPA/s0/grunge.png);
background-size: cover;
box-shadow: inset 0 0 50px #000, inset 0 0 50px #000, inset 0 0 50px #000;
-moz-transition: all 1s;
-webkit-transition: all 1s;
-o-transition: all 1s;
transition: all .1s;
}
.vintage:hover:before {
background: none;
box-shadow:none;
-moz-transition: all 1s;
-webkit-transition: all 1s;
-o-transition: all 1s;
transition: all .1s;
}

Note: In the first code, you see in bold the line that corresponds to the color of the image, you can change it to any other color, these are some examples of traditional vintage:

background-color: rgba(0,0,255, 0.5); /* blue */
background-color: rgba(0,255,0, 0.5); /* green */
background-color: rgba(0,255,255, 0.5); /* cyan */
background-color: rgba(255,0,0, 0.5); /* red */
background-color: rgba(255,0,240, 0.5); /* violet */

If you want the image to not change to its original state on mouse hover, then remove the last code:

.vintage:hover:before {
background: none;
box-shadow:none;
-moz-transition: all 1s;
-webkit-transition: all 1s;
-o-transition: all 1s;
transition: all .1s;
}

Step 5. After you've made your changes, click on Save Template

Step 6. Finally, add this code inside your posts each time you want to apply the vintage effect to an image (switch to HTML tab if you want to use this code inside your post)

<div class="vintage">
<img border="0" src="URL of the image" /></div>
<div style="clear: both;"/>

And add the URL of the image to where is the text in blue.

And that's it, with this little experiment you can have your vintage-style images using CSS only. Enjoy!
More aboutHow to Add a Vintage Style to Images In Blogger using CSS

How to Add a Widget Below First Post in Blogger

Posted by Unknown

This tutorial will show you how to make a gadget/widget to appear just below the first Blogger post.

First, you must understand that the usual gadgets provided by Blogger can be added only in the areas where the design section permits. Still, we can show any element, for example, an AdSense ad, an image, a flash file, a video etc.

So what we will do in this tutorial is to display an item under the first post, this means that it will not be visible below the other entries. This is great when you use any automatic summary, although it is not a requirement.

widget below post
Well, this is easy to do and we will use the isFirstPost conditional tag for that element to show it under the first entry.

Adding An Element Below First Post

Step 1. First, go to your Blogger Template and click on the Edit HTML button:


Step 2. Check the "Expand Widget Templates" box:

Step 3. And find this line:

<b:include data='post' name='post'/> 

Step 4. Just below it add this code:

<b:if cond='data:post.isFirstPost'>
<div align="center" style="margin-top:0px; margin-bottom:10px;">
Here goes the code of the element you want to show
</div>
</b:if>

Note:

- The bolded text indicates to where you should paste the code of the element (eg. AdSense ad, a widget). 

- In red are the top margins (margin-top) and the bottom margins (margin-bottom), this is in case you want the element to move towards or away from the entries, also you can add any style like a background color, border etc..

Step 5. Preview to make sure everything is okay, then Save your Template.
More aboutHow to Add a Widget Below First Post in Blogger

How to Customize Blogger's Lightbox

Posted by Unknown

Now, for those of you who have chosen to use the Blogger's Lightbox View to display the images, you have the option to change its style in a whole different way. We'll be able to change the black color of the screen, the border or shadow of the images and the color of the thumbnails background as well. We can customize the Blogger Lightbox entirely on your taste.

blogger lightbox, change blogger lightbox
Demo

Take a look at the screenshots below:

Before:

customize blogger lightbox, blogger lightbox

After:

blogger lightbox, change lightbox background

After adding our CSS code, the entire look of the modal window will be changed: the background color, the bar showing the thumbnails, the edge of images (border), the text that appears in it, transparency and the close button.

blogger lightbox, modify lightbox, blogger tutorials

All we have to do is to overwrite the default styles and change them for ours.

How to Change the Blogger's Lightbox Background and Style

Step 1. Go to Template, click on the Edit HTML button (also click on the Proceed button if needed)


Step 2. Search using CTRL + F the following code snippet:

]]></b:skin>

Step 3. Copy and paste the following code just above it:

/* Blogger Lightbox
----------------------------------------------- */

/* Background Color */
.CSS_LIGHTBOX_BG_MASK {
background-color: #ffffff !important;
background-image: url(image-url-address) !important;
opacity: 0.8 !important;
filter: alpha(opacity=90) !important;
}

/* Images Border */
.CSS_LIGHTBOX_SCALED_IMAGE_IMG {
outline: 0px solid #fff !important;
-webkit-border-radius: 10px;
-moz-border-radius: 10px;
border-radius: 10px;
-webkit-box-shadow: 0px 0px 5px #000000;
-moz-box-shadow: 0px 0px 5px #000000;
box-shadow: 0px 0px 5px #000000;
}

/* Close Button */
.CSS_LIGHTBOX_BTN_CLOSE {
background: url(image-url-address) no-repeat !important;
width: 24px !important;
height: 24px !important;
}

/* Thumbnails Bar Color */
.CSS_LIGHTBOX_FILMSTRIP {
background-color: #eaeaea !important;
}

/* Text Color */
.CSS_LIGHTBOX_ATTRIBUTION_INFO, .CSS_LIGHTBOX_ATTRIBUTION_LINK {
color: #000 !important;
}

/* Index Info (number of images) */
.CSS_LIGHTBOX_INDEX_INFO {
color: #555555 !important;
}

Note:

- The text in green explains to which part the code belongs (it doesn't need to be modified)

For example, the / * Background Color * / part can change the background color or even the LightBox background color to an image. If you want to do that, then change this line by replacing the red text with the url address of your image:

background-image: url(image-url-address) !important;

- The opacity is just below, if you add a lower value ( 0.8 ) the background will become more transparent.

- To change the icon for close button, you have to replace the text in red from /* Close Button */ with the url of your image. (you can host image at tinypic or upload it into a blogger draft and then Copy the Link Location)

- To change the text color of images, replace the #555555 value from /* Index Info (number of images) */

- The border of the images can be changed as much as we want: you can change the borders' roundedness, shadow, etc... but remember this is CSS3 so older versions of Internet Explorer will not see it.

Step 4. Click on Save Template and you're done!
More aboutHow to Customize Blogger's Lightbox

How to Make the Blogger Posts Have a Calendar for the Date in

Posted by Unknown

It's quite common to see calendar style dates next to some WordPress posts but for the Blogger platform it isn't always an very easy task to add this. But who said you can't do it? You need to look no further than this blog. In this tutorial, we'll learn how to create a calendar style date for your Blogger posts.


How to create calendar style dates in Blogger

Step 1. Go to Settings > Language and Formatting - Date Header Format and change the date format as you can see in my example below (put day first, then the month and finally the year)
 

Step 2. Then go to Template > Edit HTML


Step 3. Select the "Expand Widget Templates" checkbox

Step 4. And search (CTRL + F) the following line:

<h2 class='date-header'><span><data:post.dateHeader/></span></h2>

Step 5. In case you find it twice, then you should replace it twice with this code:

<div id='Date'>
<script>changeDate(&#39;<data:post.dateHeader/>&#39;);</script>
</div>
<b:else/>
<div id='Date'>
<script>changeDate(&#39;&#39;);</script>
</div>

Step 6. Now search for this tag (CTRL + F to find it)

</head>

Step 7. And paste the code from below just ABOVE the </head> tag:

<script type='text/javascript'>
//<![CDATA[
var DateCalendar;
function changeDate(d){
if (d == "") {
d = DateCalendar;
}
var da = d.split(' ');
day = "<strong class='date_day'>"+da[0]+"</strong>";
month = "<strong class='date_month'>"+da[1].slice(0,3)+"</strong>";
year = "<strong class='date_year'>"+da[2]+"</strong>";
document.write(month+day+year);
DateCalendar = d;
}
//]]>
</script>
<b:if cond='data:blog.pageType != &quot;static_page&quot;'>
<style type='text/css'>
/* Calendar style date
----------------------------------------------- */
#Date {
background: transparent url(https://blogger.googleusercontent.com/img/b/R29vZ2xl/AVvXsEj8upN29wP_JxnM1LiGzp5E1FHUqU4XMrWEOtCNHIckLRi-bWC0hcb7BuRGopObciLhVZhJFRDDGCaFhGz1OYwNCQ6GIc8Rgku3Ctc4tztIWLNXhHviL1wW5LNgtPfaKe7CiYf5wy_UkfaQ/s1600/calendar07.png) no-repeat;
display: block;
width:60px;
height:60px;
float: left;
margin: 15px 2px 0 -108px;
padding: 0 0 8px 0px;
border: 0;
text-transform: uppercase;
}
.date_month {
display: block;
font-size: 15px;
font-weight:bold;
margin-top:-1px;
text-align:center;
color:#ffffff; /* Month's color */
}
.date_day {
display: block;
font-size: 28px;
font-weight:bold;
margin-top:-8px;
text-align:center;
color:#282828; /* Day's color */
}
.date_year {
display: block;
font-size: 10px;
margin-top:-8px;
text-align:center;
color:#282828; /* Year's color */
}
</style>
</b:if>


Before saving your Template, we can make some changes:
  • To change the calendar style, replace the url in blue with yours;
  • If the calendar doesn't appear correctly, change -108 with 0;
  • With green are marked the areas where you can change the color of the dates

Step 8. Now Preview your Template and if everything is ok, click on the Save button. Enjoy!
More aboutHow to Make the Blogger Posts Have a Calendar for the Date in

How to Change Default Anonymous Avatar in Blogger Comments

Posted by Unknown

In the last tutorial, I wrote about how you can change avatars size in blogger comments and in this simple tutorial, I will show you how to change or customize default avatar of anonymous commenters or Blogger users with no picture added on their profiles. After Blogger announced new feature of threaded comment, we can still customize it by adding a jQuery plugin to our template and replacing the default anonymous avatar found at this

URL http://img1.blogblog.com/img/anon36.png
and the one for blogger users http://img2.blogblog.com/img/b36-rounded.png

...with our own.

anonymous, default avatar, blogger blogspot

Step 1.

Go to Dashboard - Template - click on the Edit HTML button and then Proceed


...then select Expand Widget Template (don't forget to make a backup)

    Step 2. Find (CTRL + F) this code in your template:

    </body>

    Step 3. Add the following code just above it:

    <script src='http://code.jquery.com/jquery-latest.js'/>
    <script>
    $(&quot;img[src=&#39;http://img1.blogblog.com/img/anon36.png&#39;]&quot;)
    .attr(&#39;src&#39;, &#39;https://blogger.googleusercontent.com/img/b/R29vZ2xl/AVvXsEhNmzyH1JXGuZaS4FZKK239RDaIdRypOC8pmEXx0BsCBwTDjb4gR0vDGQ6GIorxSmnwKEAUrxYmrlob-jTQnCBrxlHG4iGktmgujti3EQX65FOWGHUqFfKR6UAvgBl9dOi-GFhd5kZsOiI/s1600/default_avatar.gif&#39;)
    .ssyby(&#39;blank&#39;)
    </script>
    <script src='http://code.jquery.com/jquery-latest.js'/>
    <script>
    $(&quot;img[src=&#39;http://img2.blogblog.com/img/b36-rounded.png&#39;]&quot;)
    .attr(&#39;src&#39;, &#39;https://blogger.googleusercontent.com/img/b/R29vZ2xl/AVvXsEjtXOGCjN5Xa9YXZfPnsE5VKfsSMNCqNlVpD0Saf3_J55I7OoAFDF7t4hUu8y_5csg2bmzCKxgJOr4MavNJIx20I_TjFFr9PWXFYe9nukpmGBSVpX9VshX0oNEBASSObXJ_nDaxPlMrEkQ/s1600/blogger-user.png&#39;)
    .ssyby(&#39;blank&#39;)
    </script>

    Step 4. Save the Template

    How to change avatar:

    For Anonymous users: Replace the code in red with the url address of your image
    For Blogger users: Replace the URL in blue with your own.

    You can choose one from these below (copy the url address):


    https://blogger.googleusercontent.com/img/b/R29vZ2xl/AVvXsEhNmzyH1JXGuZaS4FZKK239RDaIdRypOC8pmEXx0BsCBwTDjb4gR0vDGQ6GIorxSmnwKEAUrxYmrlob-jTQnCBrxlHG4iGktmgujti3EQX65FOWGHUqFfKR6UAvgBl9dOi-GFhd5kZsOiI/s200/default_avatar.gif


    https://blogger.googleusercontent.com/img/b/R29vZ2xl/AVvXsEhT4duC85eD0MHclAJzp8U9VRlP6AmZfRJsxtHRTmfRsU3DRL17gYbRWBafaYvv3ivW0Kw425s1Amte_Q6BoAHv0lXEy9qXwLrxV0tPHYgwUAHQEcxfblRVxt_iibAb-RAXV3DHkRGT28Y/s1600/facebook.gif


    https://blogger.googleusercontent.com/img/b/R29vZ2xl/AVvXsEiU_11Pbuw8rA0LYLLIO1VQpOhW1bdj9rBM-Hk4rjBR-yCFW2UAtv_5Ly8Zx-vsBCZqBDjNsPaZQcs8gKVghRsWybrFCvBCnYEyEkehzoLpXC34u_0zlSuXysA4IVNaeQmeQpwKOaxTZzg/s1600/anonymous3.png


    https://blogger.googleusercontent.com/img/b/R29vZ2xl/AVvXsEi6S4CDvytbSP3jvobUr_RJJfhIM_84tBf3C1m8RfPKb-BDnNneX-yy7niH6HxGklgZkGKfUJqpQmy6B98uJEXgOKq-nphai-16XpvnyJMECSTCZ_C804p0INfJCoa6YkYDU_sGijKmwzsf/s1600/blogger-user.png


    That's it!
    If you liked this post, please consider sharing it.

    More aboutHow to Change Default Anonymous Avatar in Blogger Comments

    How to Hide Blogger Sidebar to Display AdSense For Search Results

    Posted by Unknown

    When visitors are searching for content on your blog, you have the following options to display the search results: opening the results in the same window, in a new window or within your own site using an iframe.

    But the best option is to display the search results in your own site/blog, mainly because you are not sending people off your blog and when they are taken to a new page of search results, so it could be confusing many times because it doesn't look anything like your site or Google. Therefore, displaying the search results within your site, could look more professional and could also increases your page views and your revenue from the ads on the search page.

    A problem that many bloggers are facing is that the page which displays the AdSense for search results must be at least of 800 px wide, so the posting area must be of minimum 800px and there's nothing like that in most of the blogs.

    So, what we will do in this tutorial is to set up the search results to be displayed in a static page (none of other posts or pages will be affected) where we'll remove the sidebar, so that we'll have enough space to make the post/page section of 800px wide. Also, we will create a static page specially designed for the search results, then create a new AdSense for search in our AdSense account and finally add a small snippet of code top in your Blogger template to hide the sidebar in that specific page.

    Search results span the width of the page with the sidebar hidden:


    Display AdSense For Search Results Within Blogger Page

    Step 1. Create a new static page on your blog, you can give it the title 'Search Results' but leave the content section empty and then Publish the page.

    Step 2. When you publish the page you have the option to add the page to a menu, choose the third option 'No Gadget Link To Pages Manually' click 'Save and Publish'. OR in case this screen will not appear, right click on View Page and select Copy Link Address. We will need this URL of the page when creating the AdSense for search.

    Step 3. Go To Your AdSense account, then go to My ads tab, select the Search option and Create a New custom search engine. Follow the steps until you come to the Search results option.

    Step 4. Select the 3rd method "on my website using an iframe", then Enter the URL of the page you created into the URL field and continue.


    Step 5. Follow the rest of the set up process, at the end you will be given two pieces of code. The first piece of code is for the actual search bar that you can paste into a Html/Javascript gadget in your sidebar or wherever you want it. The second piece of code you must copy and paste into a new HTML/JavaScript gadget and after clicked on Save - drag it above the Blog Posts area


     Now that you have your page set up with the search results code and your search bar code in your sidebar, it is time to add a snippet of code to your template to remove the sidebar.

    Adding The Code In Blogger To Change the Results Page Layout

    Step 1. In Your Blogger Dashboard, go to Template > Edit HTML - then click Proceed 


    Step 2. Select the "Expand widget templates" box


    Step 3. Find (CTRL + F) the following piece of code

    ]]></b:skin>

    Step 4. Just below it, paste this code:

    <b:if cond='data:blog.url == &quot;PAGE-URL-HERE&quot;'>
    <style>
    .main-inner .columns {
    padding-left: 0px !important;
    padding-right: 0px !important;
    }
    .main-inner .fauxcolumn-center-outer {
    left: 0px !important;
    right: 0px !important;
    }
    .main-inner .fauxcolumn-left-outer, .main-inner .fauxcolumn-right-outer, .main-inner .column-left-outer, .main-inner .column-right-outer {
    display: none !important;
    }
    </style>
    </b:if>

    Note: Replace PAGE-URL-HERE with the url address of the page where the search results will be displayed (the one you have added at the step 4)

    Step 5. Now Save Template and you're done!

    This simple trick allows you not only to hide the sidebar in the search results page, you can, as well, hide it in any page you want... just create your page and follow the same steps. It is also good to hide the sidebar in Privacy Policy Pages, Contact Pages and in all the non-content-based pages with little content or no content at all.

    Make sure to check out other interesting AdSense Tutorials.
    If you need more help, leave your comments below.

    More aboutHow to Hide Blogger Sidebar to Display AdSense For Search Results

    Show Blogger Image only in Homepage and Hide it in Post Page

    Posted by Unknown


    To hide images/pictures from our blogger posts and to make them appear only in homepage, we will have to add just a small piece of CSS code in our template and then use the class "hidepic" each time we want to hide an image.

    Just follow the next steps:

    Step 1. Go to Dashboard - Template - Edit HTML ( click on Proceed button )


     Step 2. Select "Expand Widget Template" (make a backup)

       Step 3. Find (CTRL + F) this code in your template:

          }]]></b:skin>

      Step 4. Copy and paste the following code just below it

      <b:if cond='data:blog.pageType != &quot;index&quot;'>
      <style>
      .hidepic{
      display: none;
      }
      </style>
      </b:if>

      Step 5. Save the Template.

      Now everytime you create a post, firstly add the pic you want to hide and then switch to HTML tab where you'll see the HTML code of the image you have added that will look something like this:

      <div class="separator" style="clear: both; text-align: center;">
      <a href="https://blogger.googleusercontent.com/img/b/R29vZ2xl/AVvXsEjhS6EC2ik5upO18jSdfJqY0C7U_kBKGP5j97Bdp18PrFkHNGbGko0XQ_FuMTcCFw9G14eGcnY9M70UgtQo2gbwmJ0Ms1FU6l6vmYSBGef4Iv9KA7F7HmU9-kWl54ZgDSimpJZBmzIixAo/s1600/fire_bird_by_fhrankee-d32af8v.png" imageanchor="1" style="margin-left: 1em; margin-right: 1em;"><img border="0" height="320" src="https://blogger.googleusercontent.com/img/b/R29vZ2xl/AVvXsEjhS6EC2ik5upO18jSdfJqY0C7U_kBKGP5j97Bdp18PrFkHNGbGko0XQ_FuMTcCFw9G14eGcnY9M70UgtQo2gbwmJ0Ms1FU6l6vmYSBGef4Iv9KA7F7HmU9-kWl54ZgDSimpJZBmzIixAo/s320/fire_bird_by_fhrankee-d32af8v.png" width="320" /></a></div>

      Note: it should be at the exact location where your image has been added 
      (if the image is at the middle of the text, then the code should be found at the middle)

      Step 6. Replace "separator" with "hidepic" - see the screenshot below:


      If you need more help, please leave a comment below.

      More aboutShow Blogger Image only in Homepage and Hide it in Post Page

      How to Remove Showing Posts With Label in Blogger

      Posted by Unknown

      label, blogger, remove, how to

      For any default Blogger layout, the "Showing posts with label" message shows up above the posts whenever you click on a label link. As it's a pretty useless and annoying message, many people like to have it removed. If that is your wish, just follow the tutorial below:

      Removing "Showing post with label...show all posts"

      Step 1. Go to Dashboard - Template - Edit HTML (if necessary, click on Proceed button)


      Step 2. Click somewhere inside the template code, then search - using CTRL+F - this code:

      <b:includable id='status-message'>

      After you found it, click on the sideways arrow next to it, to expand the rest of the code.

      Screenshot:

      Step 3. Below is this code that you need to remove - along with the first one, as well:

           <b:includable id='status-message'>
            <b:if cond='data:navMessage'>
            <div class='status-msg-wrap'>
              <div class='status-msg-body'>
                <data:navMessage/>
              </div>
              <div class='status-msg-border'>
                <div class='status-msg-bg'>
                  <div class='status-msg-hidden'><data:navMessage/></div>
                </div>
              </div>
            </div>
            <div style='clear: both;'/>
            </b:if>
          </b:includable>

      Screenshot 

       Step 4. Replace it with this one:

      <b:includable id='status-message'>
      <b:if cond='data:navMessage'>
      <div>
      </div>
      <div style='clear: both;'/>
      </b:if>
      </b:includable>

      Step 5. Save the template. Now view your blog and click on some label....there should be no box anymore.

      More aboutHow to Remove Showing Posts With Label in Blogger

      How to number comments in Blogger/BlogSpot

      Posted by Unknown

      This Blogger hack will show you how to add comment count inside a speech bubble, so that you & your readers can use the numbers to mention or point to a particular comment on any of your posts and besides this, it could as well improve the look and feel of your blog.

      Note: This works with the previous blogger commenting system, so if you want to add this hack, you should remove first the Blogger threaded comments. Learn here How to remove Blogger threaded comments

      UPDATE! Now you can add comment bubble in your threaded comments too. Read this tutorial:
      How to Add Numbered Comments In Threaded Comments
      blogger blogspot, tricks

      How to add numbered comments on our Blogger/Blogspot blog
      how to blog, blogspot blogger

      Step 1. Go to Dashboard - Template - Edit HTML (click on Proceed button, if needed)


       Step 2. Select "Expand Widget Template" (make a backup)

        Step 3. Now find (CTRL+F) the following code in your template:

        <b:loop values='data:post.comments' var='comment'>

        Step 4. Immediately above/before it, paste this code:

        <script type='text/javascript'>var CommentsCounter=0;</script>

        Step 5. Find this code:

        <data:commentPostedByMsg/>

        Step 6. And immediately below/after it, copy and paste this:

        <!--comments-count-starts-->
        <span class='comments-number'>
        <a expr:href='data:comment.url' title='Comment Link'>
        <script type='text/javascript'>
        CommentsCounter=CommentsCounter+1;
        document.write(CommentsCounter)
        </script>
        </a>
        </span>
        <!--comments-count-stops-->

        Step 7. Find (CTRL+F) this tag in the template:

        </head>

        Step 8. Paste this code just above/before it:

        <!-- comments-count-starts-->
        <style type="text/css">
        .comments-number a:link, .comments-number a:visited {
        color: black !important;
        text-decoration: none !important;
        background: url(https://blogger.googleusercontent.com/img/b/R29vZ2xl/AVvXsEiRv8eMwRLlh15co5yiCDD-LieX2XLcQHxb1gvYpDMfhRbqyGE3ZETXtGUtnwSWZKwBJF0aJ4fGAEnJb44SFMQdNfclmYkA05TUn0nljz6b4M6ND1K5ZV9nKPeAonkFvEU_oQM__iKT_zJX/s1600/comment+bubble+1.png) no-repeat;
        width: 50px; /*image-width size*/
        height: 48px; /*image-height size*/
        float: right;
        display: block;
        margin-right: 5px;
        margin-top: -15px; /*comments-counter position*/
        text-align: center;
        font-family: 'Century Gothic','Lucida Grande',Arial,Helvetica,Sans-Serif;
        font-size: 15px;
        font-weight: normal;
        }
        .comments-number a:hover, .comments-number a:active {
        color: #1BA0E1 !important;
        text-decoration: none !important;
        }
        </style>
        <!-- comments-count-stops-http://fe-blogger.blogspot.com-->

        Note:
        • To change the comment bubble, replace the red text from above with your own address
        • To change the color of the numbers, replace the blue text with the hex value of your color

        Comment Bubbles 

        To choose a comment bubble, right-click on the image and select "Copy Image Address/Location":


        how to blogblogger blogspotblogspot blogger, how to blogwidget blogger blogspotblogs, how to blogblogspot or blogger, how to blogtutorials, how tocomments, how to, blogspot bloggernew comment, how to blogblog design, bloggerblogger.com


        IMPORTANT: You could use any image instead of the one linked in the code above (STEP 8) but after that, you should modify the size values (width and height), so that the numbers inside the bubble to be correctly adjusted.

        Step 9. Save the template... and enjoy your comments :]

        You might also be interested in this tutorial from the same category:
        How to Add a Comment Bubble to Blogger Post Titles.


        More aboutHow to number comments in Blogger/BlogSpot